Joomla installation on Mirohost hosting
Installing CMS can be done in various ways. You can choose the method that is most convenient for you. One option is to download the CMS installation package from the official developer’s website, extract it, and follow the steps for preparation and configuration.
If you wish to use a quick CMS installation via the Mirohost control panel, follow the steps below:
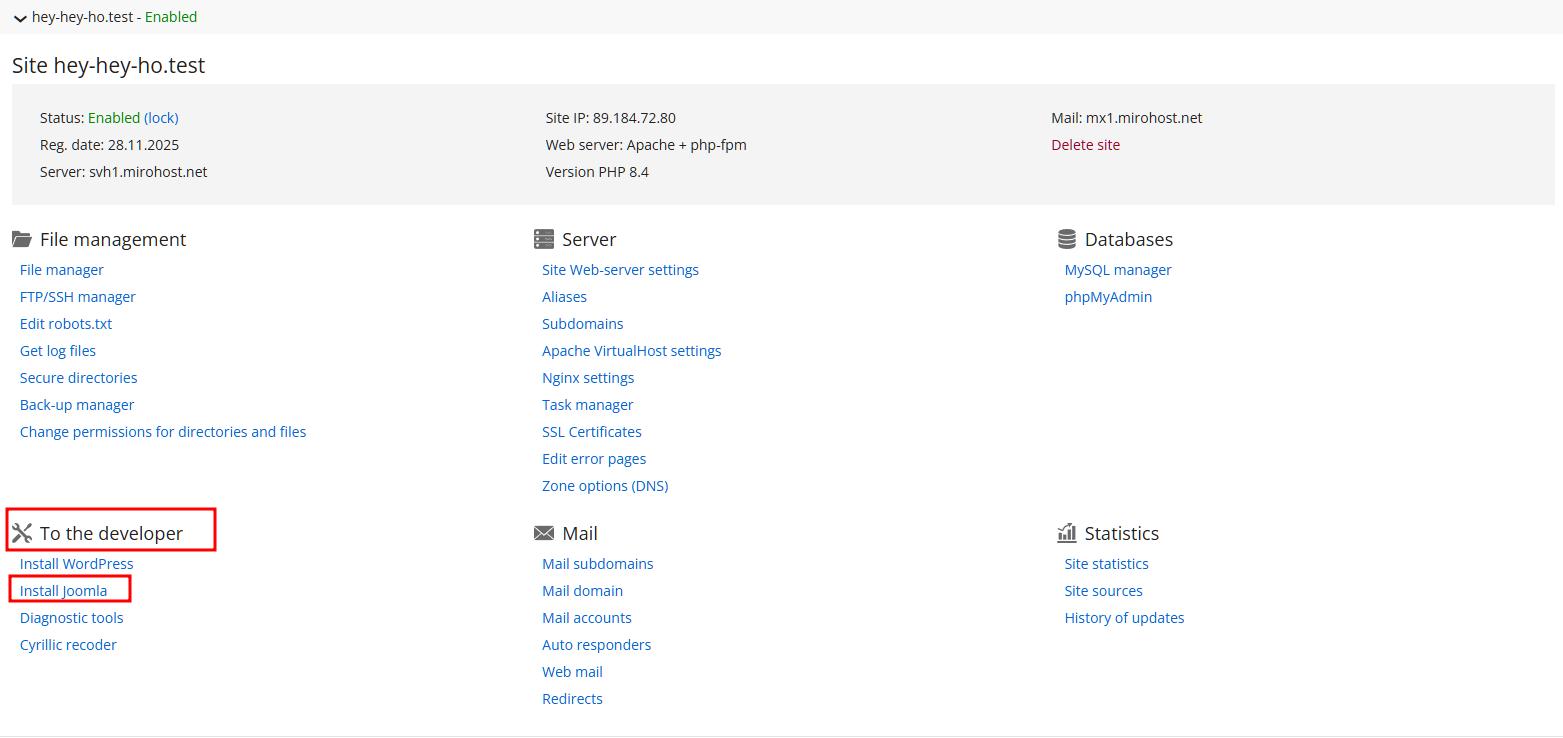
Step 1. Log in to the hosting control panel, go to the management of your hosting package, and select the website where you want to create a site using Joomla CMS. Step 2. Navigate to "Developer" -- "Install Joomla"
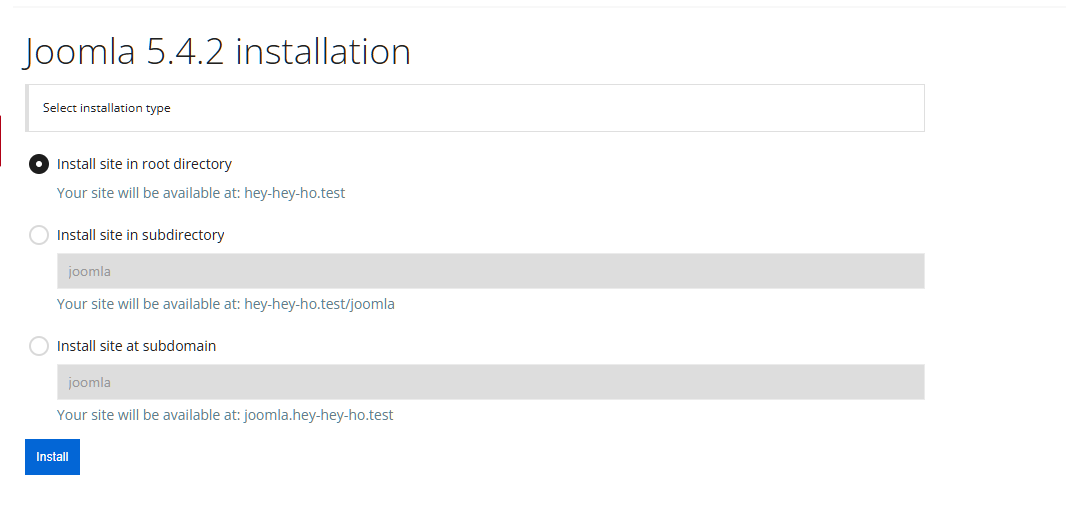
Step 3. Choose the installation option: on the main site, in a subdirectory of the main site, or create a subdomain and install Joomla on it.
Step 4. Fill in the fields, select the database that will be used in the future.
To continue setup after installation, ensure that the domain or subdomain points to our hosting.
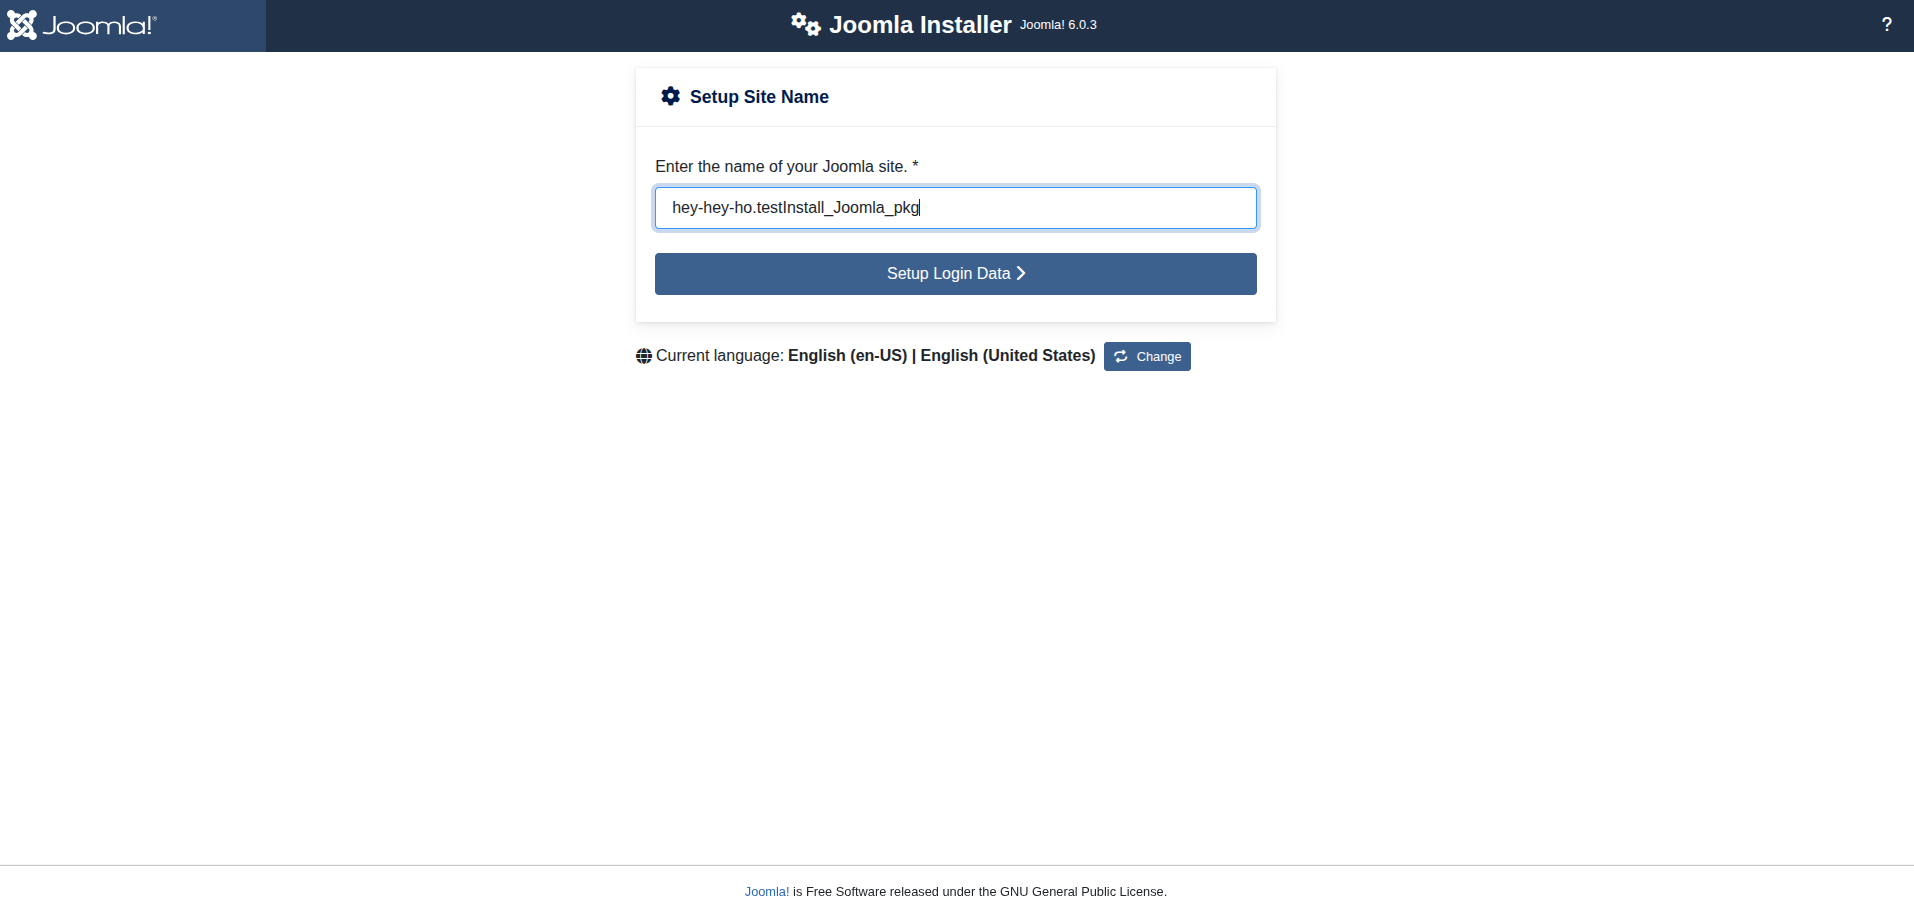
Step 5. Visit your website in the browser and proceed with the configuration.
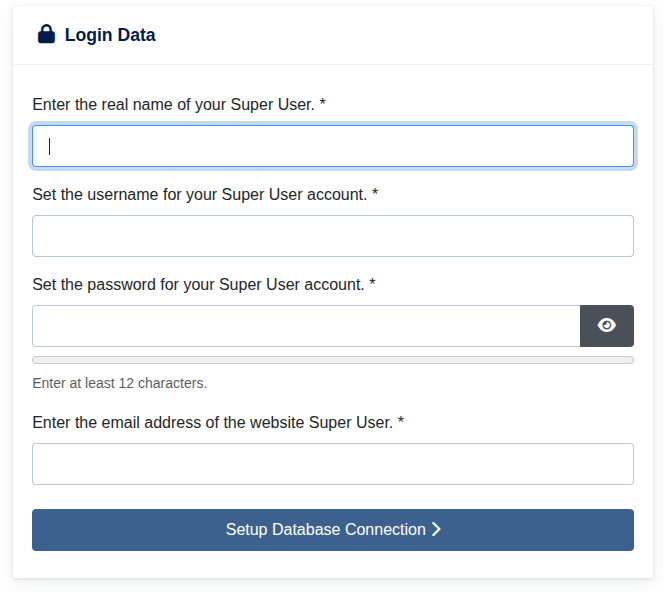
Fill in all the fields, specify the credentials for logging into the site’s admin panel (login and password), and in subsequent steps, provide the database connection details you specified earlier. After entering all necessary parameters, log in to the admin panel to create your project.
Installing Joomla! from a downloaded package
Download the CMS archive files from the official developer’s website, upload the archive to your hosting, and unpack it into the website directory. Open your domain in a new tab and fill out the site configuration form:
Site name — enter your website’s name Description — enter a description for your site for search engines (optimal length: 20 words) Admin email — enter the administrator email address Admin login — create a login for the site administrator Admin password — create and confirm a password for the administrator account
Click the "Configure Database Connection" button.
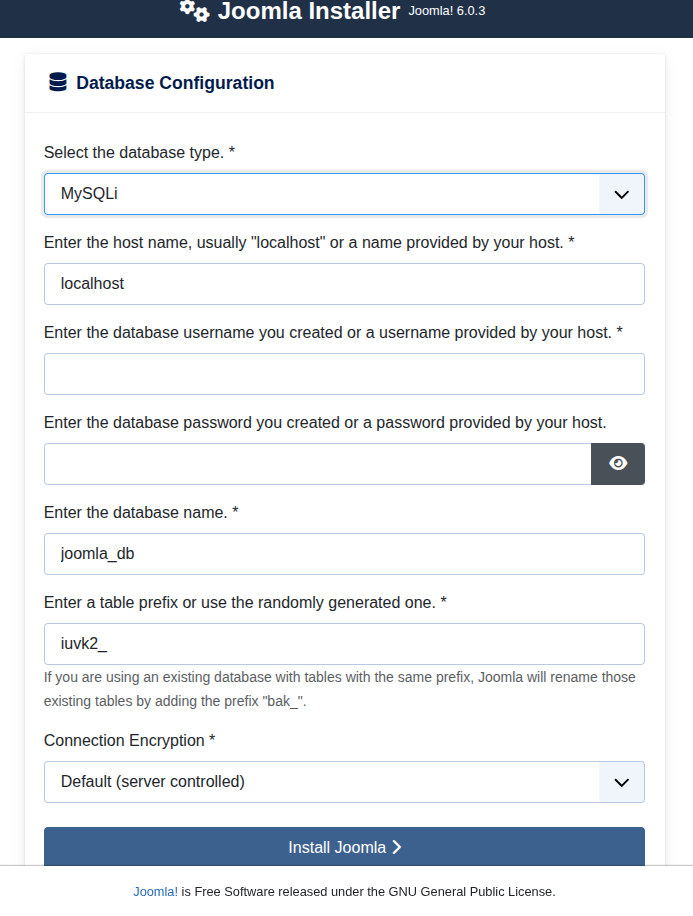
Database configuration:
Database type — leave default
Database host — leave default as localhost
Database username — specify the database username generated in step 1
Password — enter the database password generated in step 1
Database name — enter the database name created in step 1
Table prefix — specify the table prefix or use the auto-generated one.
Recommended prefix length:
3-4 characters (letters and digits) plus an underscore at the end.
Click "Next." Final setup:
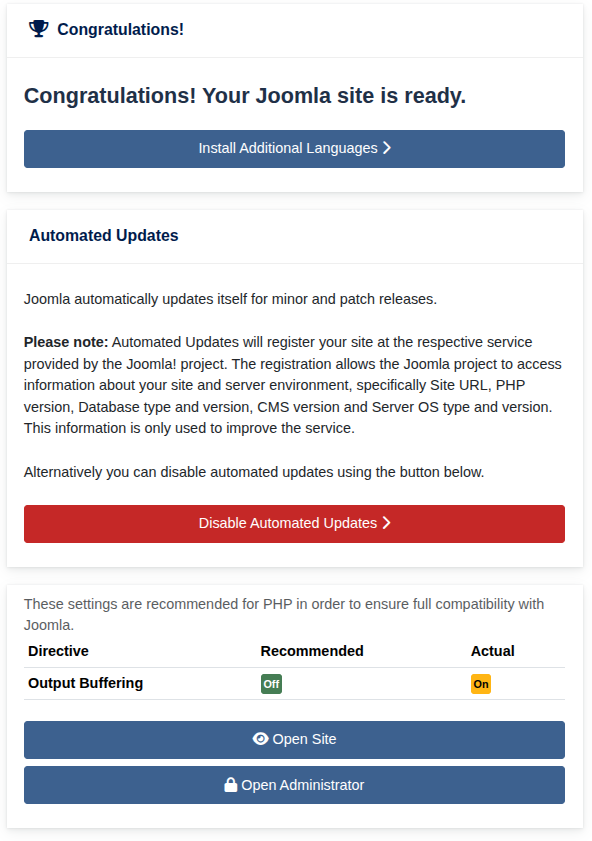
Immediately after installation, you can:
install additional language packs; disable automatic updates; view your website to see how it looks; access the site’s admin panel for further configuration and content creation.