Setting DKIM signature
Step 1. Login to the Mirohost control panel
Step 2. Go to website management and select the domain you need
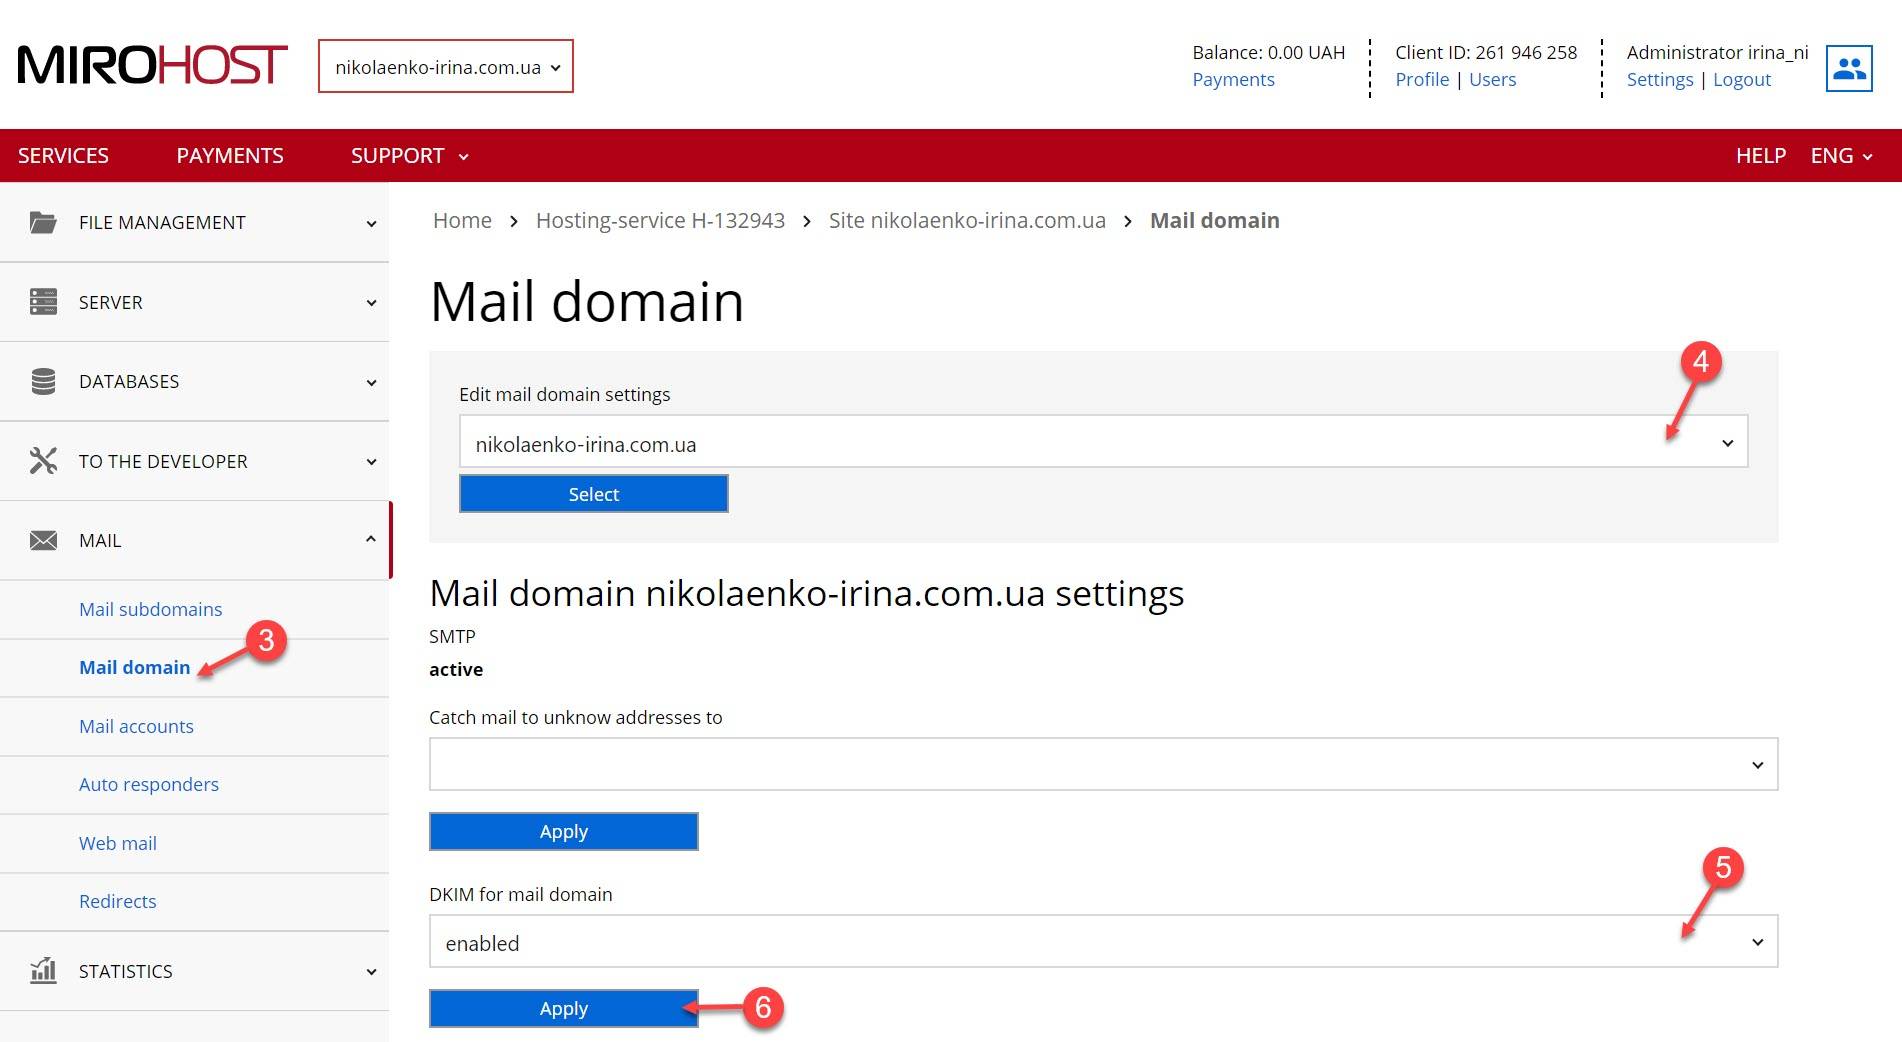
Step 3. Select ‘Domain settings’ (‘Mail management’ → ‘Domain settings’)
Step 4. Select the domain/subdomain you need and press ‘Select’.
Step 5. Enable DKIM for mail client.
Step 6. Save settings with ‘Apply’ button.

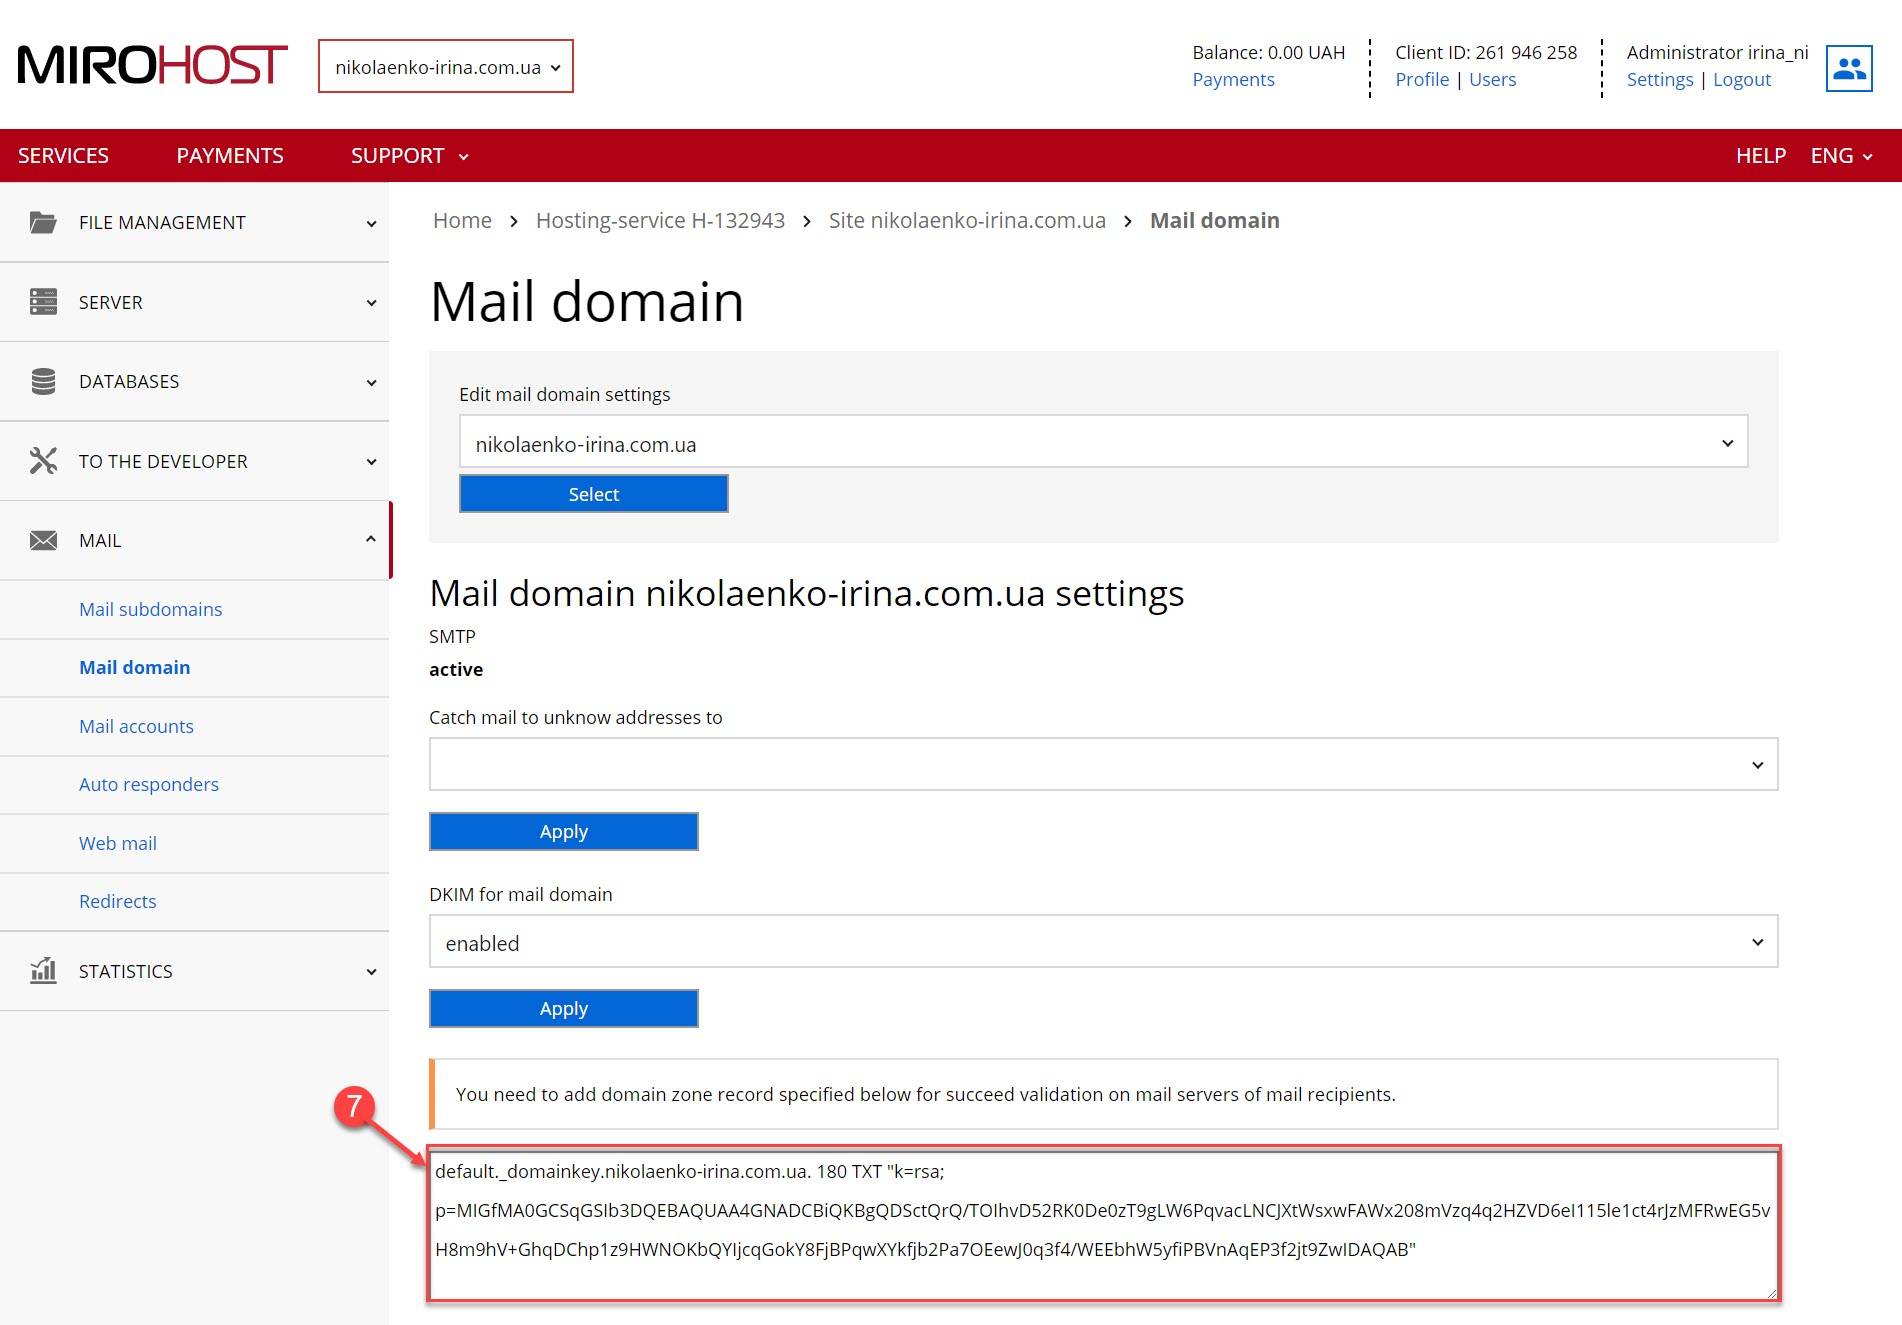
Step 7. Get generated record.
To pass checking of your users’ mail servers, you have to add the record below to domain zone settings. If you use Mirohost DNS, you can do it in ‘Zone management’ → ‘Zone settings’ section.

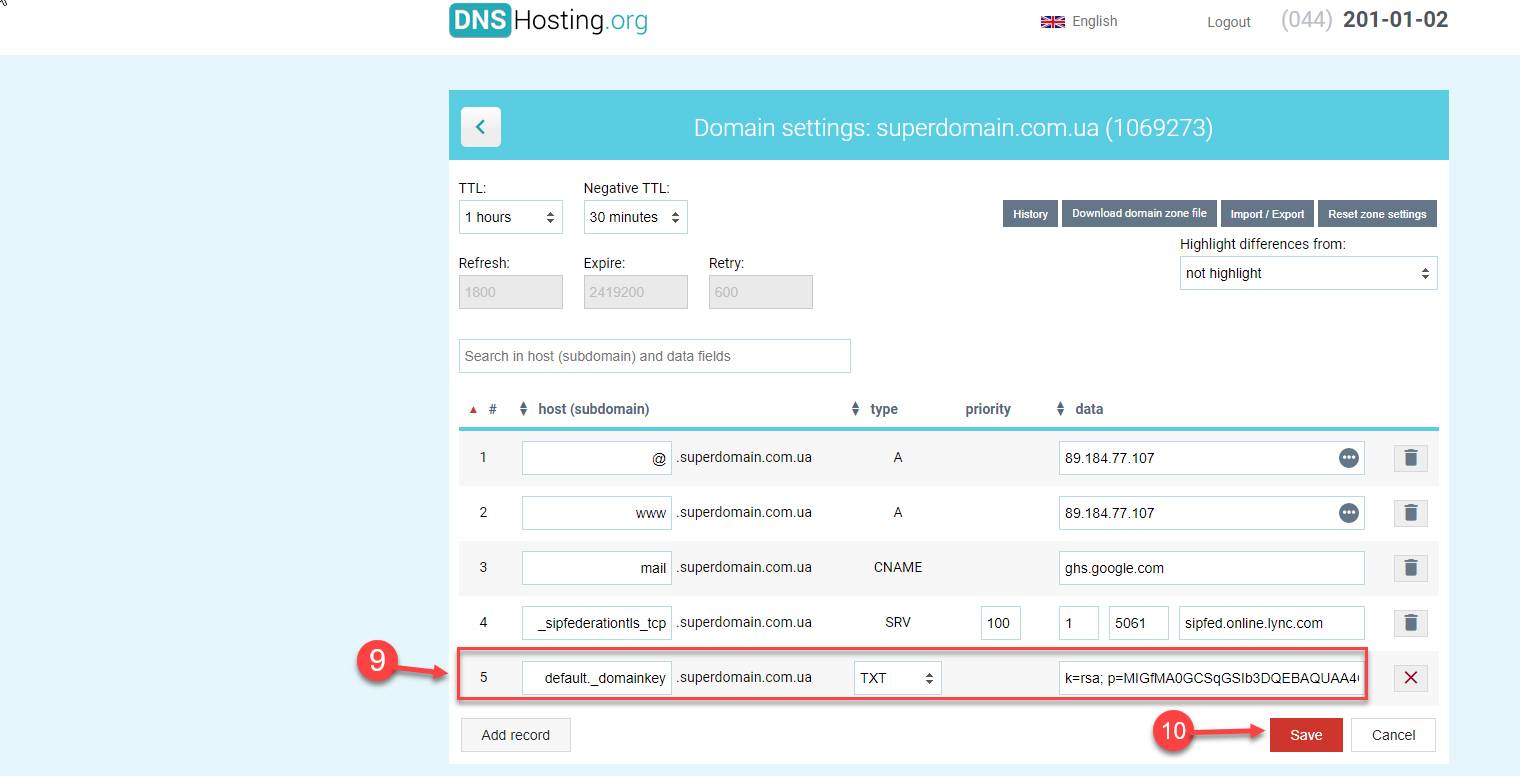
Step 8. Go to your domain DNS settings.
Step 9. Add generated record.
- host — default._domainkey
- record type — TXT
- data — k=rsa; p=MIGfMA0GCSqGSI...
Step 10. Apply the settings.

