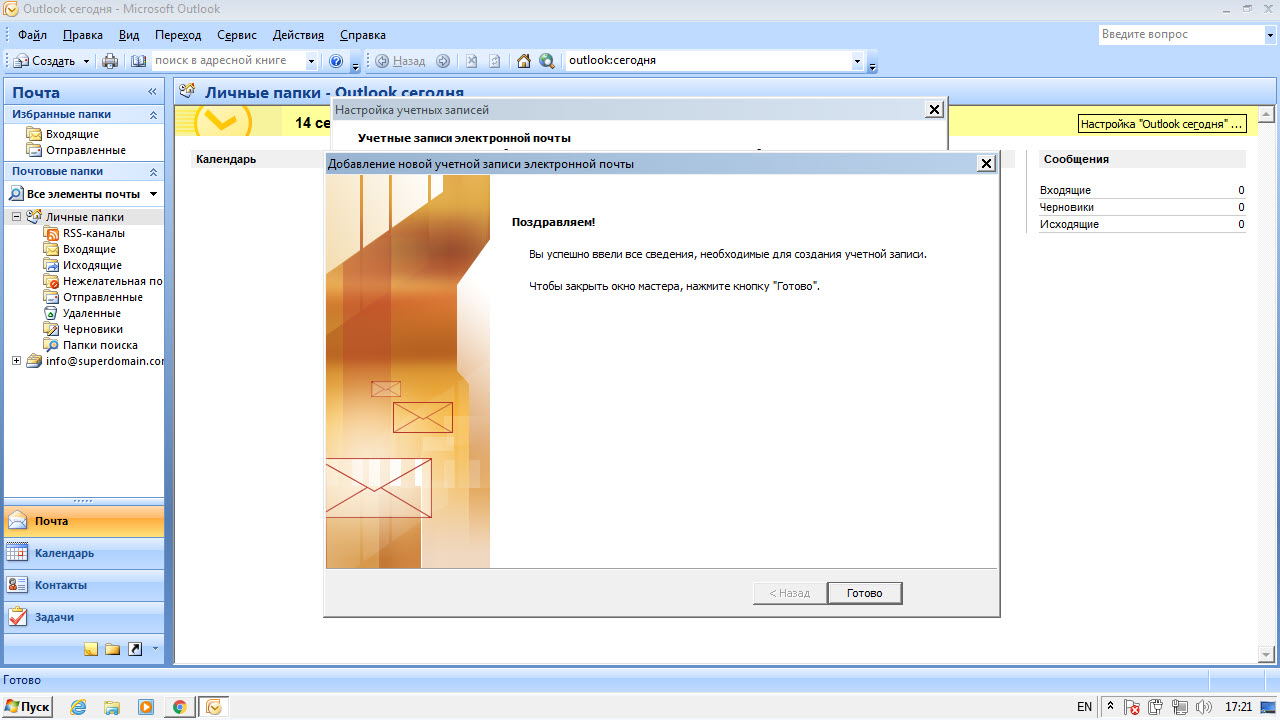
Microsoft Outlook 2003/2007
Step 1. Run the program and press ‘Tools’ → ‘E-mail accounts’
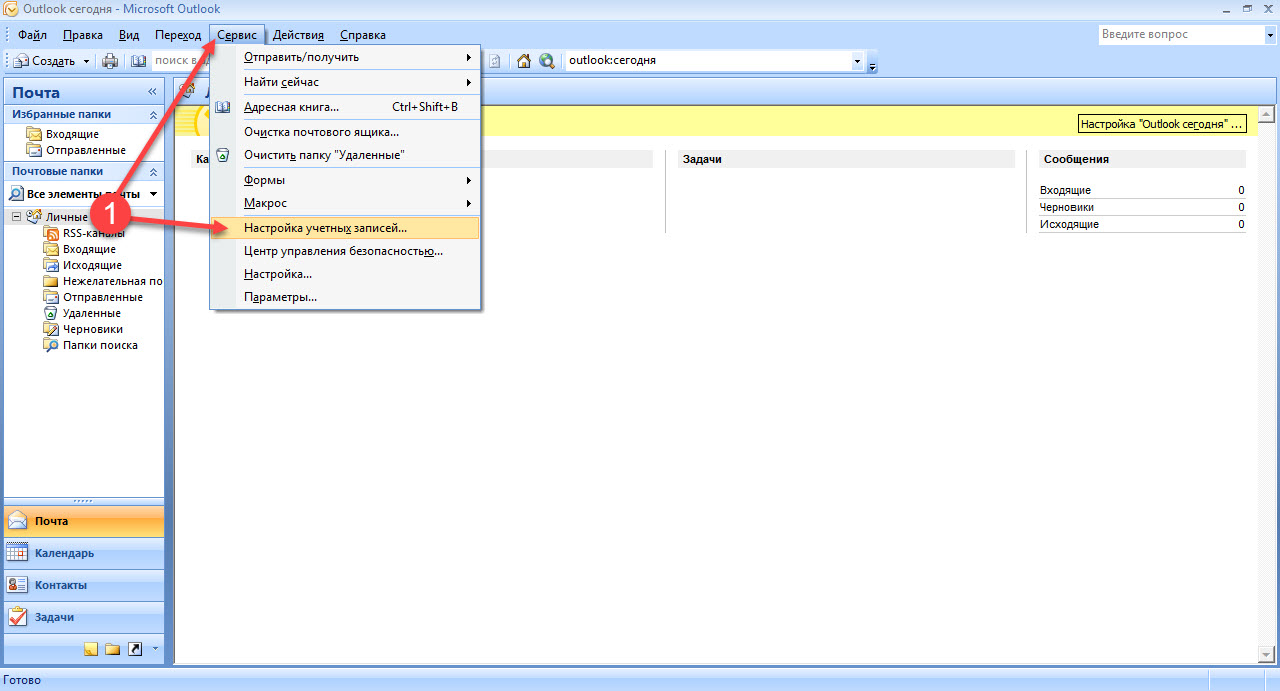
Step 2. Press ‘Add a new email account’ in ‘Account settings’ window
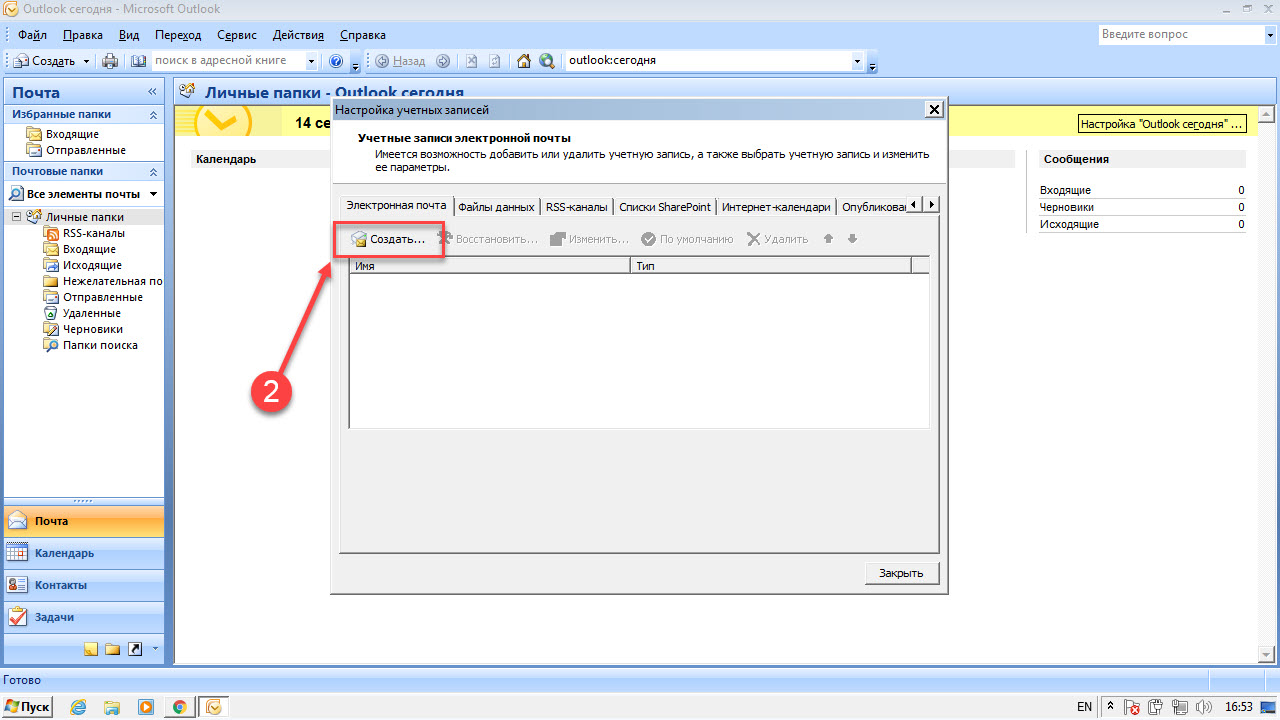
Step 3. Select ‘Manually configure server settings or additional server types’
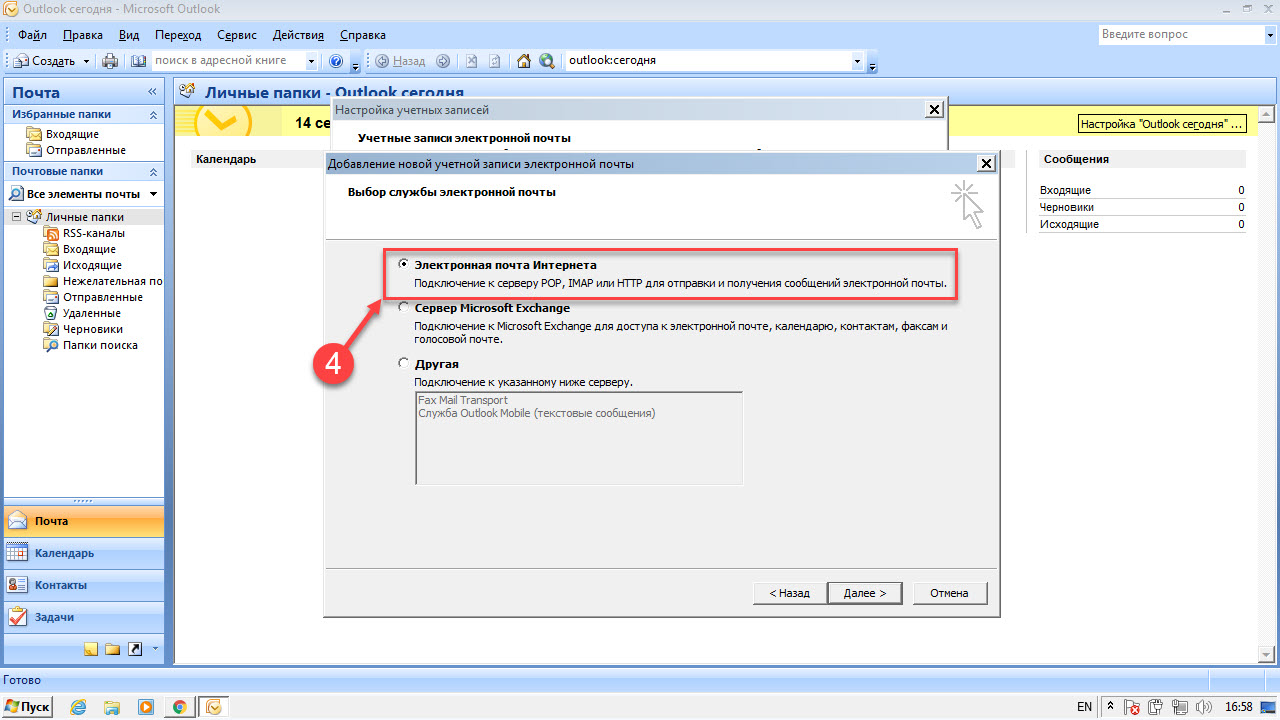
Step 4. Select ‘Internet E-mail’
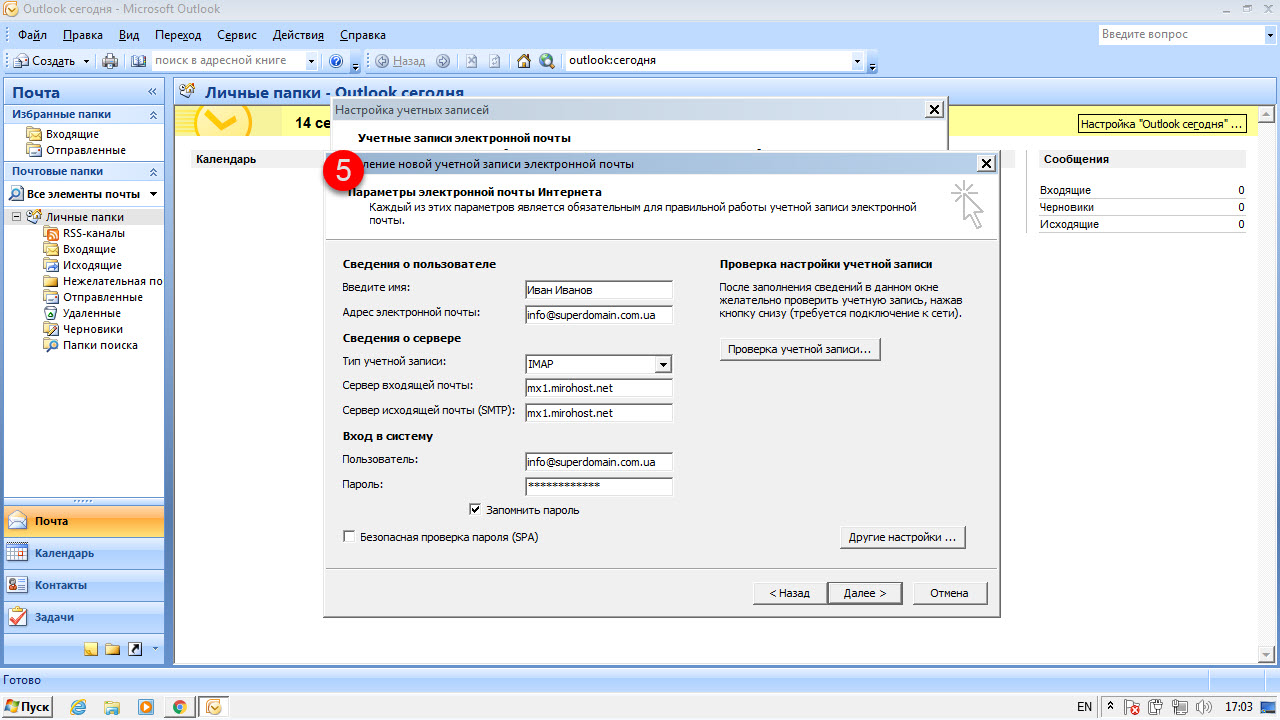
Step 5. Specify the following account settings
- Your name — user name
- E-mail address — full email address (example: name@domain)
- Account type — IMAP
- Incoming mail server — mx1.mirohost.net
- Outgoing mail server (SMTP) — full email address (example: name@domain)
- User name — full email address (example: name@domain)
- Password — specified in the Mirohost control panel
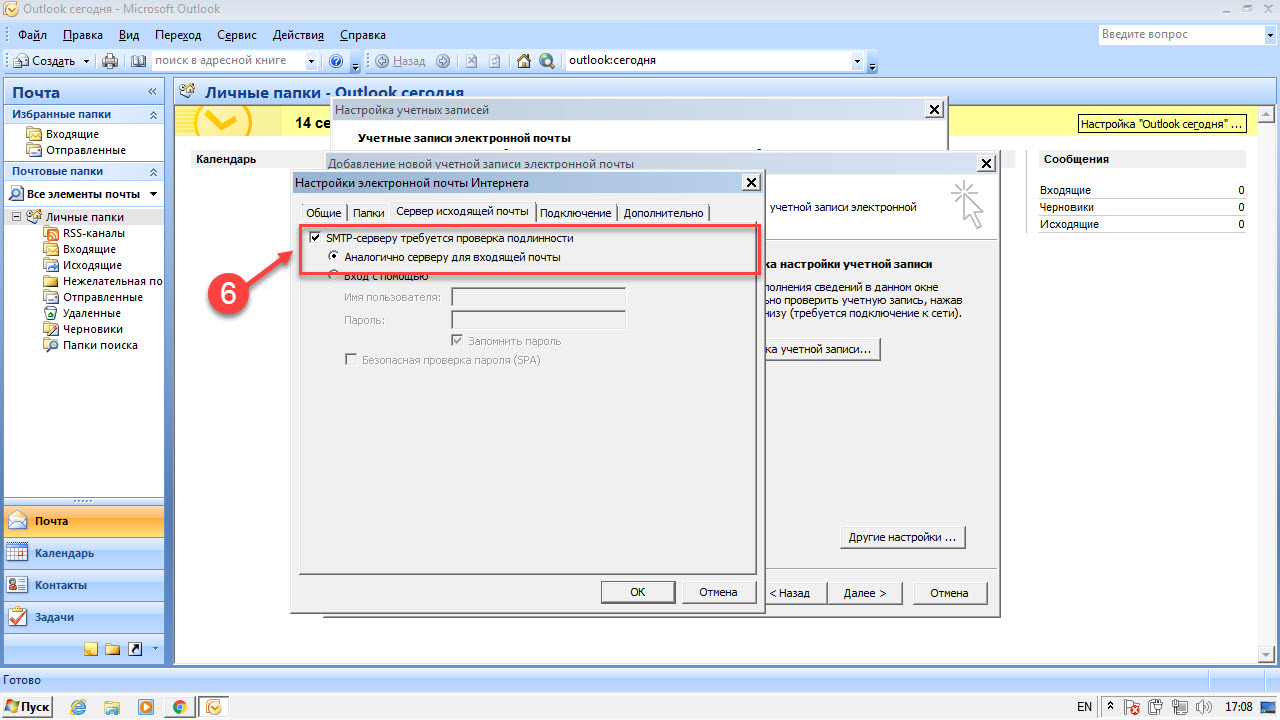
Step 6. Press ‘More settings’
Go to ‘Outgoing server’ and enable ‘My outgoing server requires authentication’ and check ‘Use same settings as my incoming mail servers’.
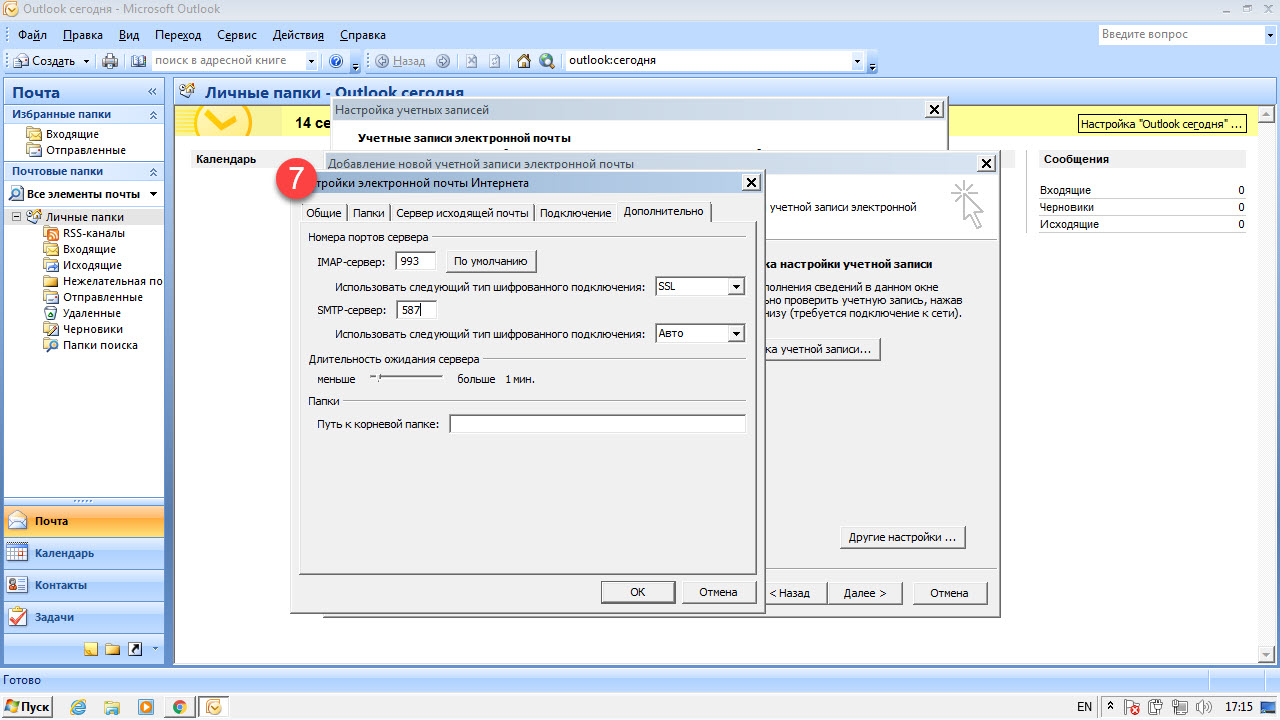
Step 7. Go to �‘Advanced’ tab.
In ‘Use the following type of encrypted connection’ select ‘SSL for Imap and SMTP server’. Specify the following:
- IMAP: Type of encrypted connection — SSL, Port — 993
- SMTP: Type of encrypted connection — Auto, Port — 587
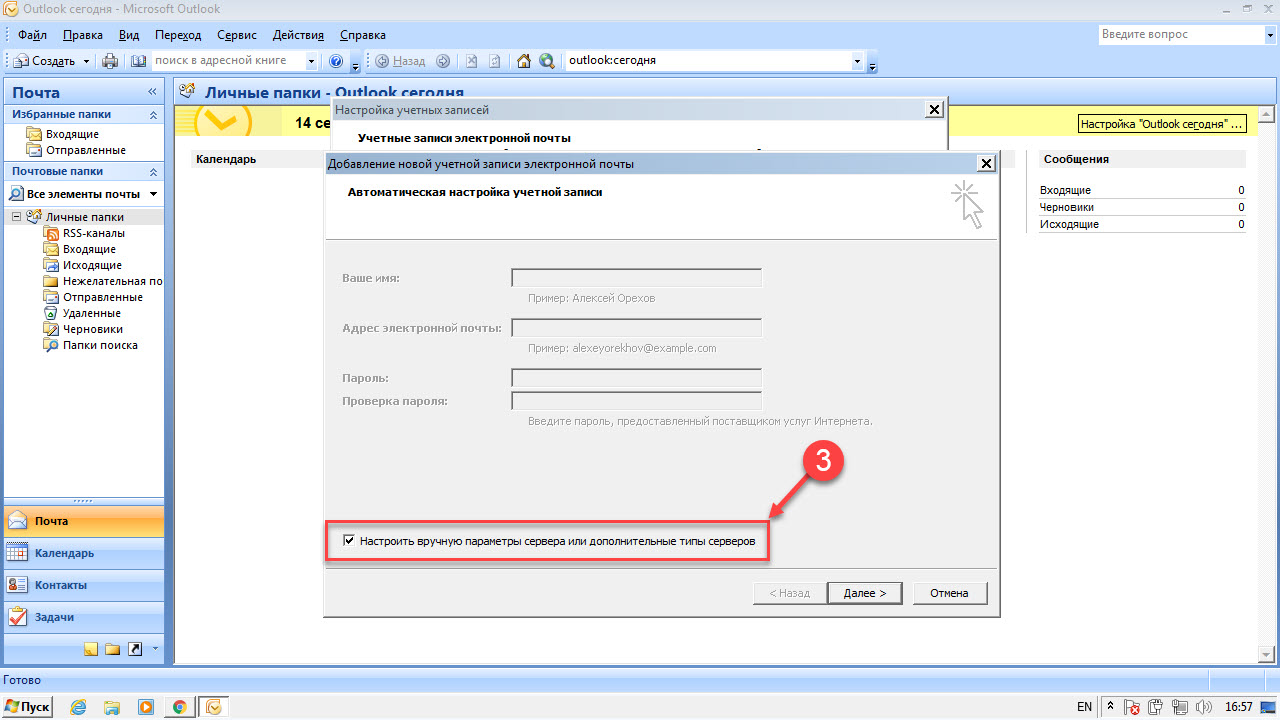
Press Ok and Next.
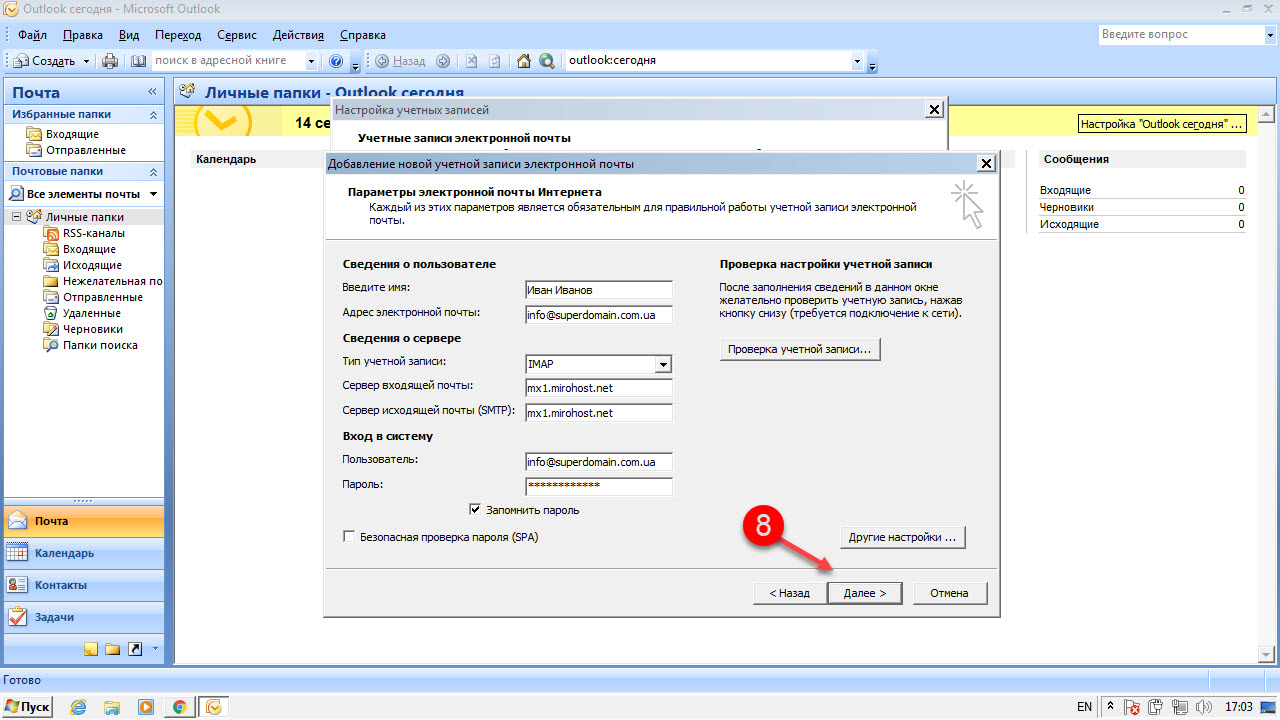
And finish Microsoft Outlook settings.
