Microsoft Outlook 2010
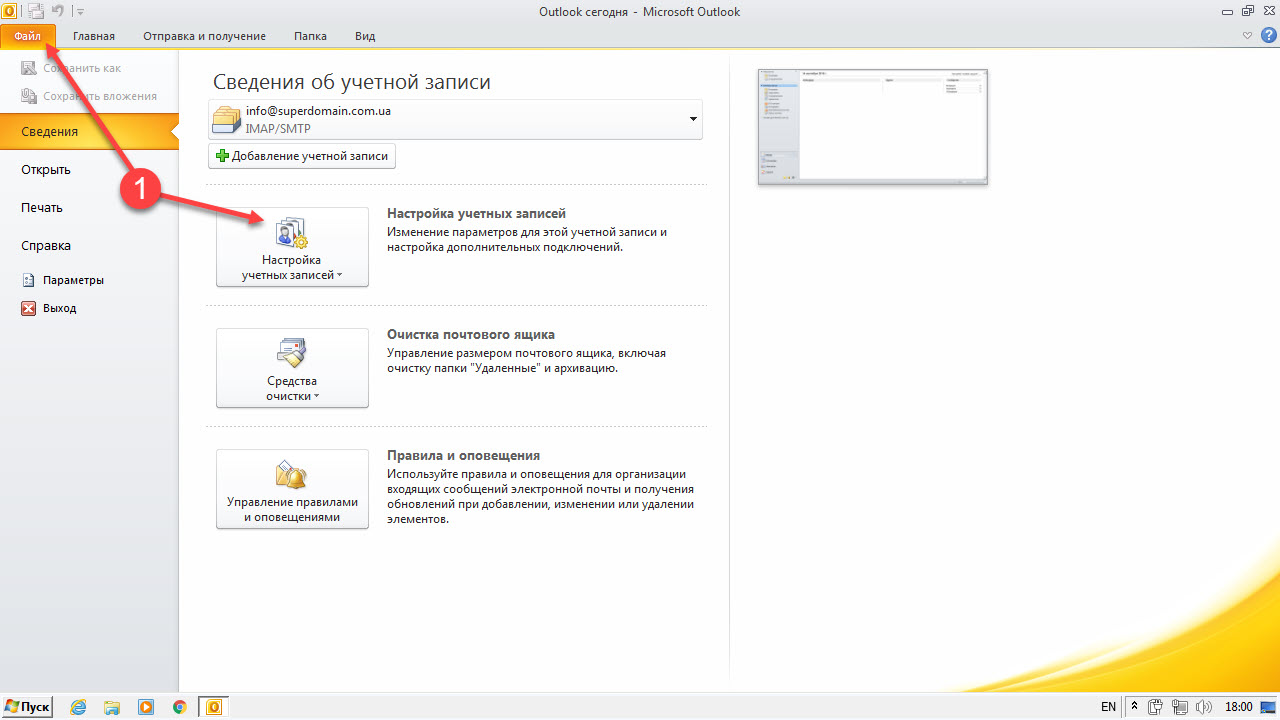
Step 1. Run the program and press ‘File’ → ‘Account settings’
Step 2. Press ‘New’’

Step 3. Select ‘E-mail account’
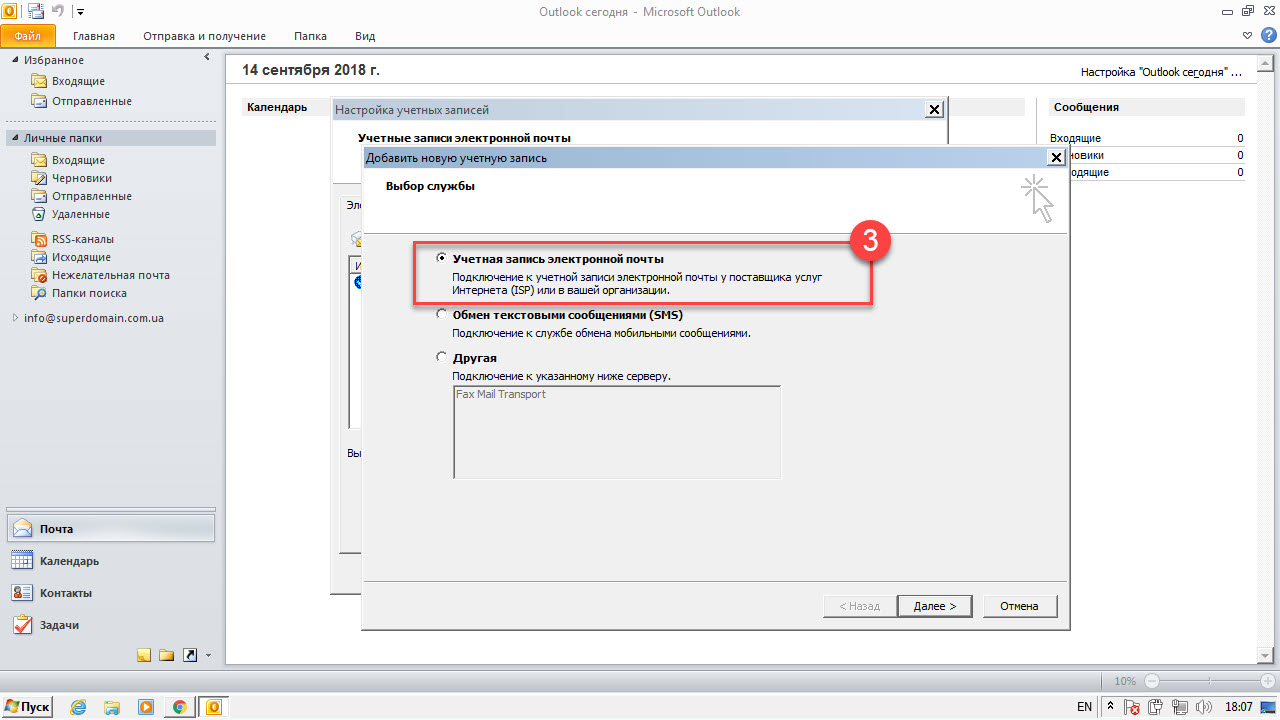
Press Next
Step 4. Select ‘Manually configure server settings or additional server types’
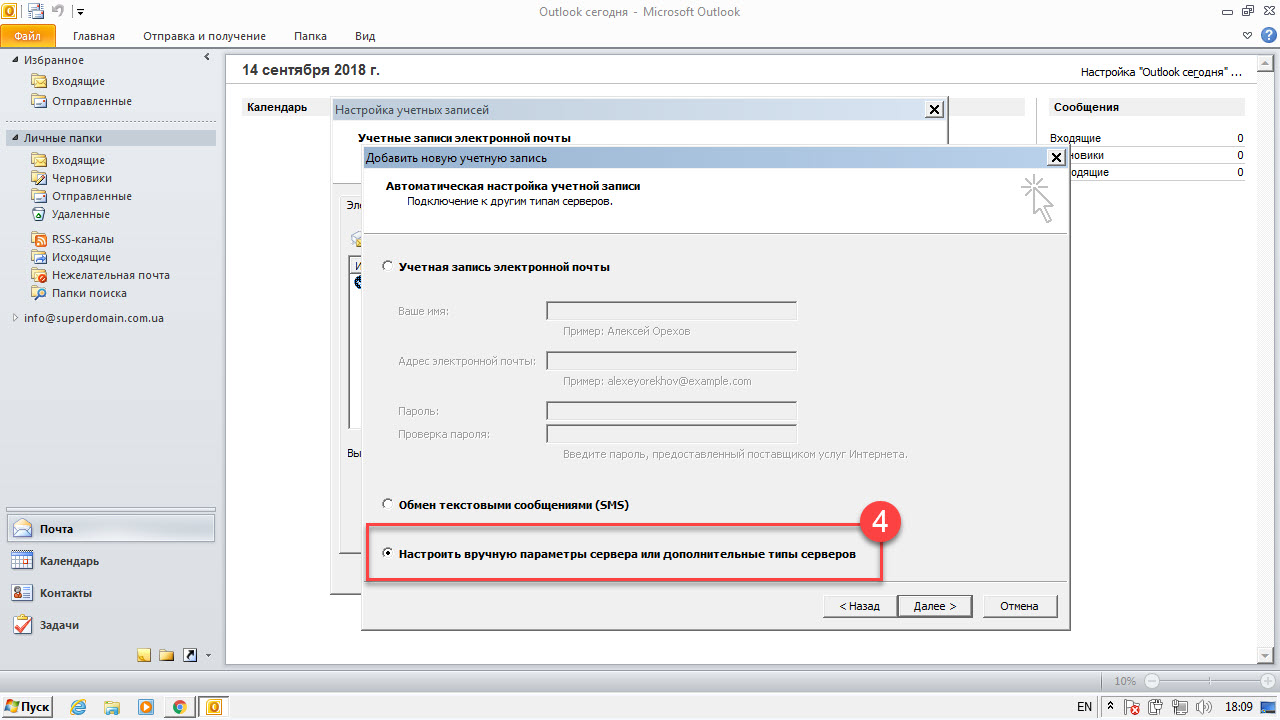
Press Next.
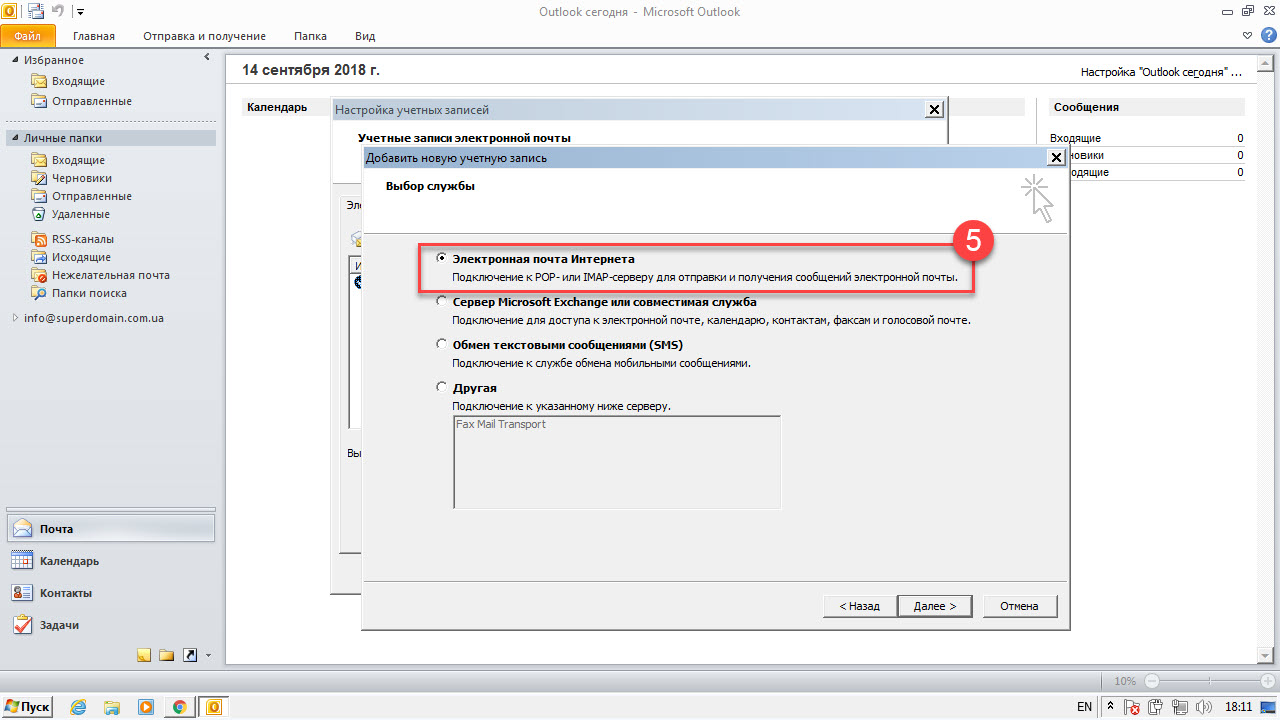
Step 5. Select ‘Internet E-mail’
Step 6. Specify the following account settings
- Your name — user name
- E-mail address — full email address (example: name@domain)
- Account type — IMAP
- Incoming mail server — mx1.mirohost.net
- Outgoing mail server (SMTP) — full email address (example: name@domain)
- User name — full email address (example: name@domain)
- Password — specified in the Mirohost control panel
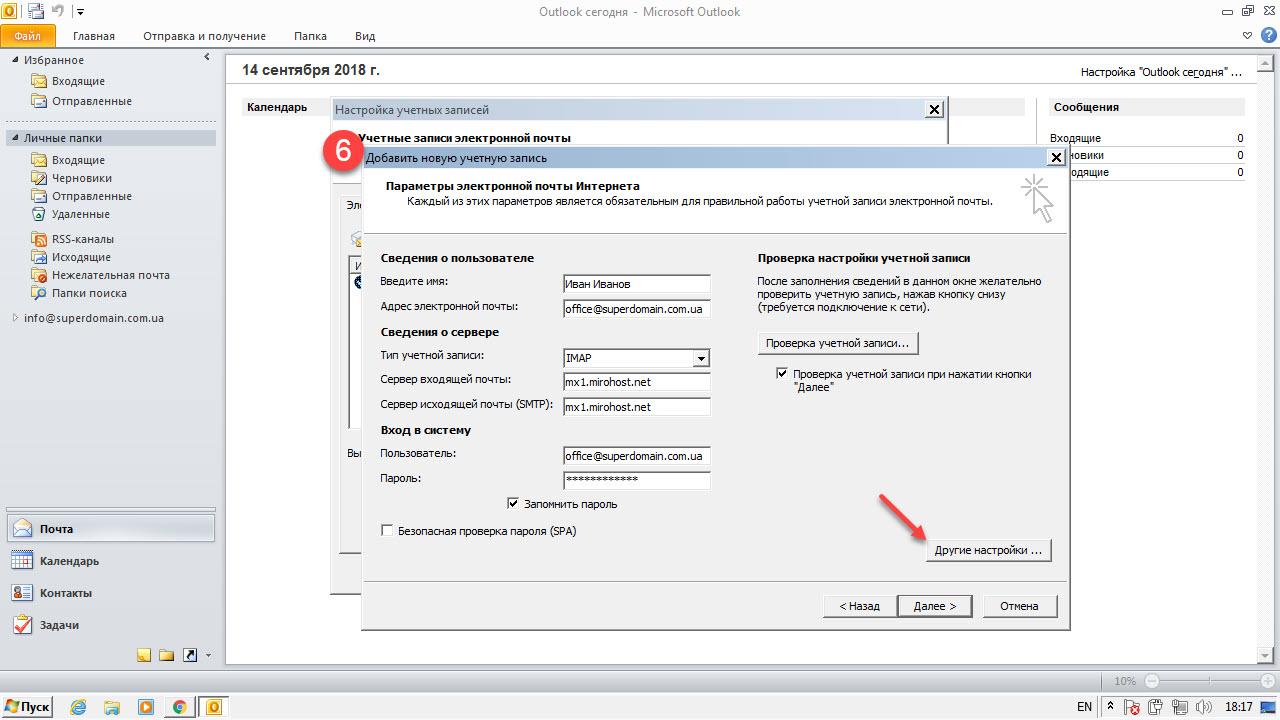
Set the other settings by default.
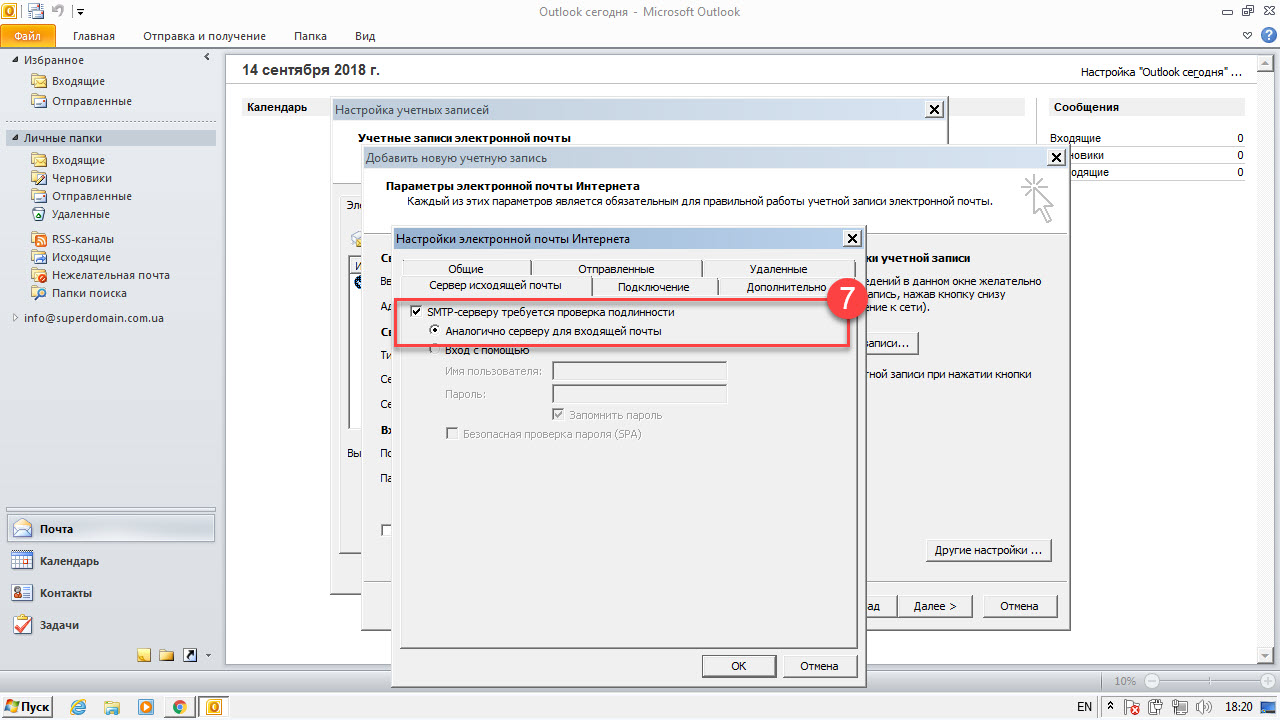
Step 7. Press ‘More settings’
Go to ‘Outgoing server’ and enable ‘My outgoing server requires authentication’ and check ‘Use same settings as my incoming mail server’.
Step 8. Go to ‘Advanced’ tab.
In ‘Use the following type of encrypted connection’ select ‘SSL for Imap and SMTP server’. Specify the following:
- IMAP: Type of encrypted connection — SSL, Port — 993
- SMTP: Type of encrypted connection — Auto, Port — 587
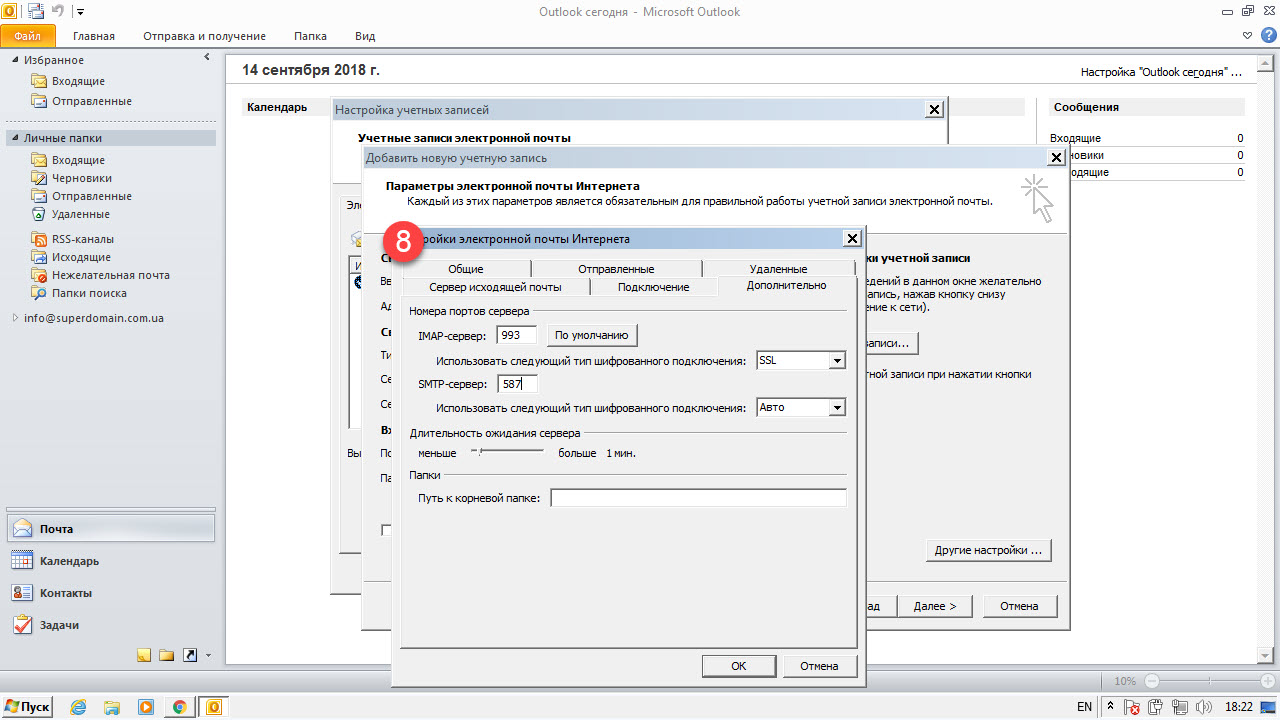
Press Ok.
Step 9. Check connection settings.
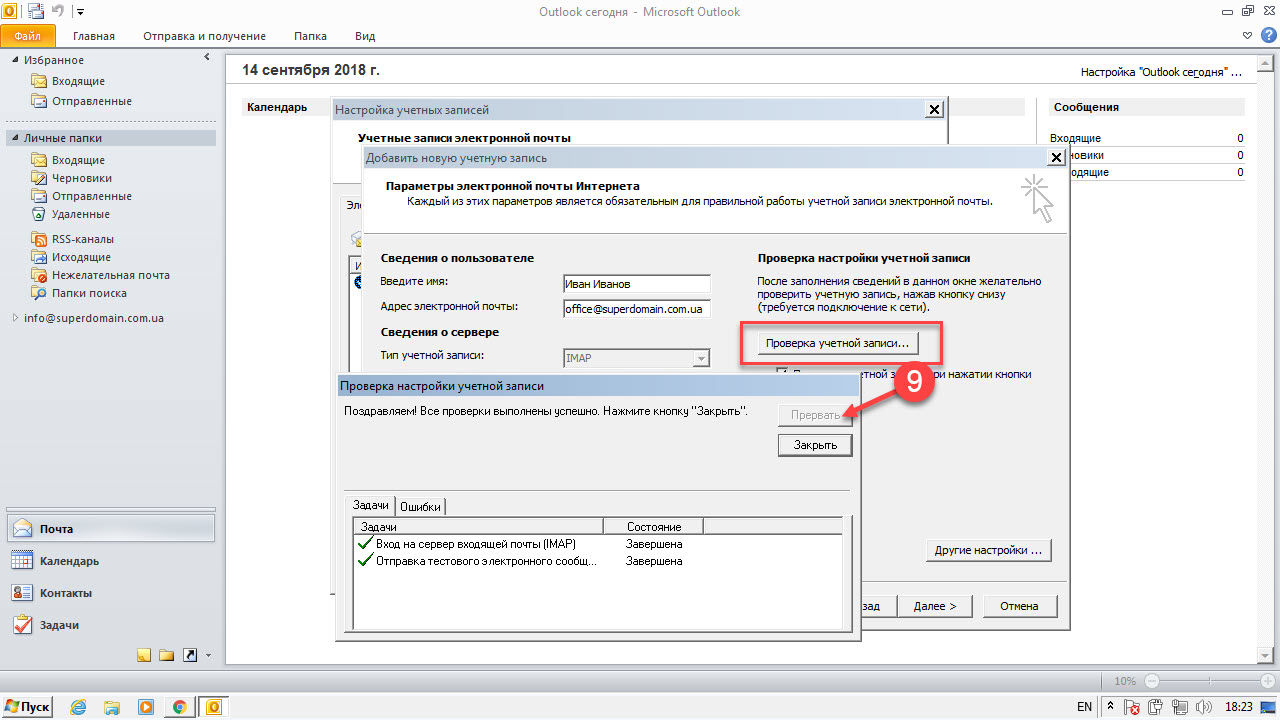
If checking is successful, press ‘Finish’. If not, make sure that all parameters are specified correctly.
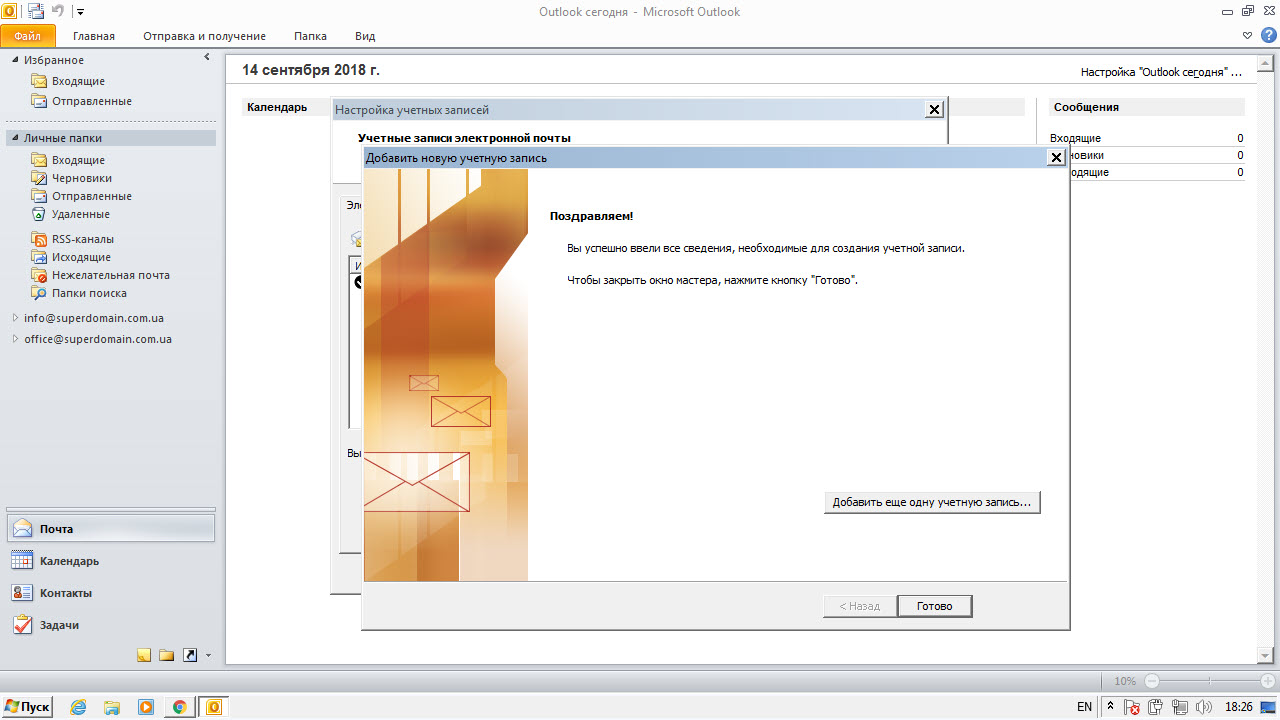
Step 10. Finish Microsoft Outlook settings.
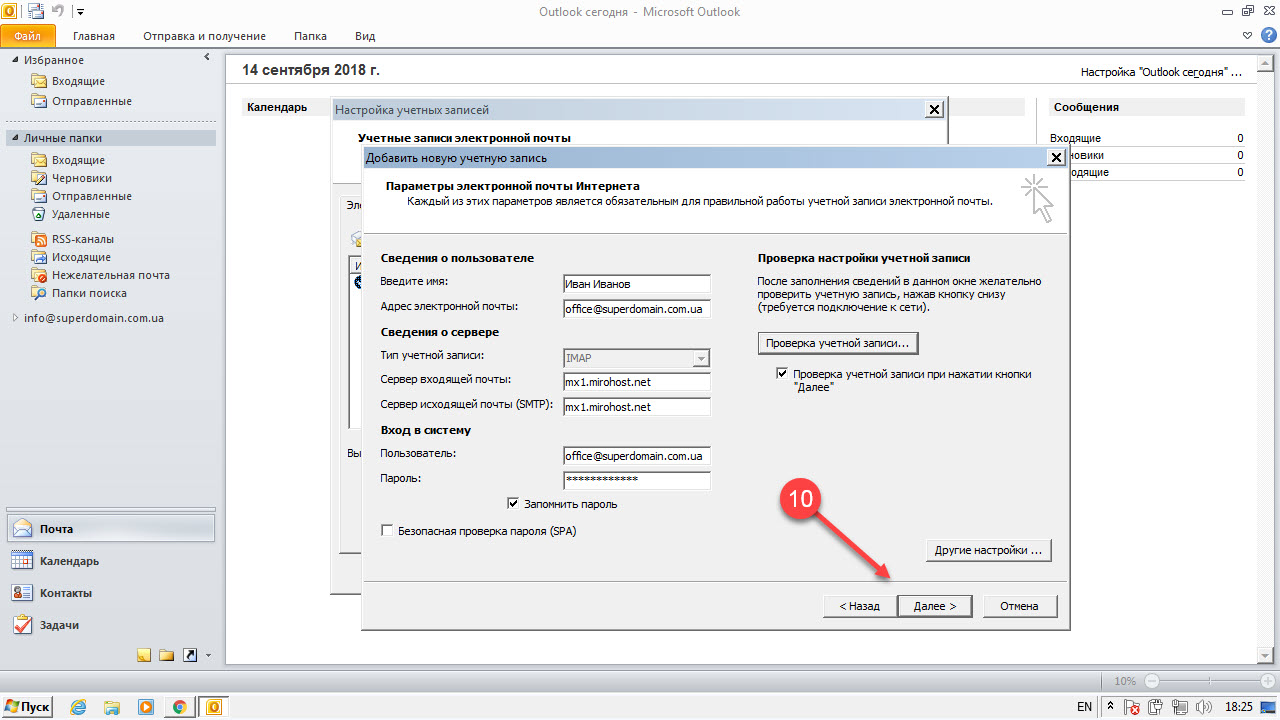
Press ‘Finish’
