Setting up Mirohost mail collector in Gmail
Setting up a Gmail mail collector from another mailbox allows you to collect all the emails from other addresses and forward them to your primary Gmail mailbox. This is very useful for those who use multiple email addresses but do not want to check each of them separately. The mail collector helps to centralize all the mail in one place, which will make the process of checking mail more convenient and efficient.
Log in to your Gmail account
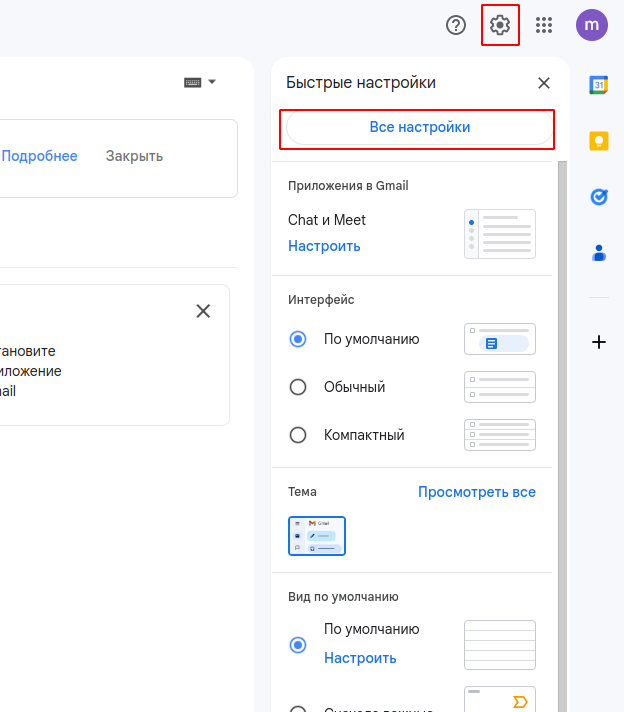
- Click the gear icon in the upper right corner and select "All Settings".
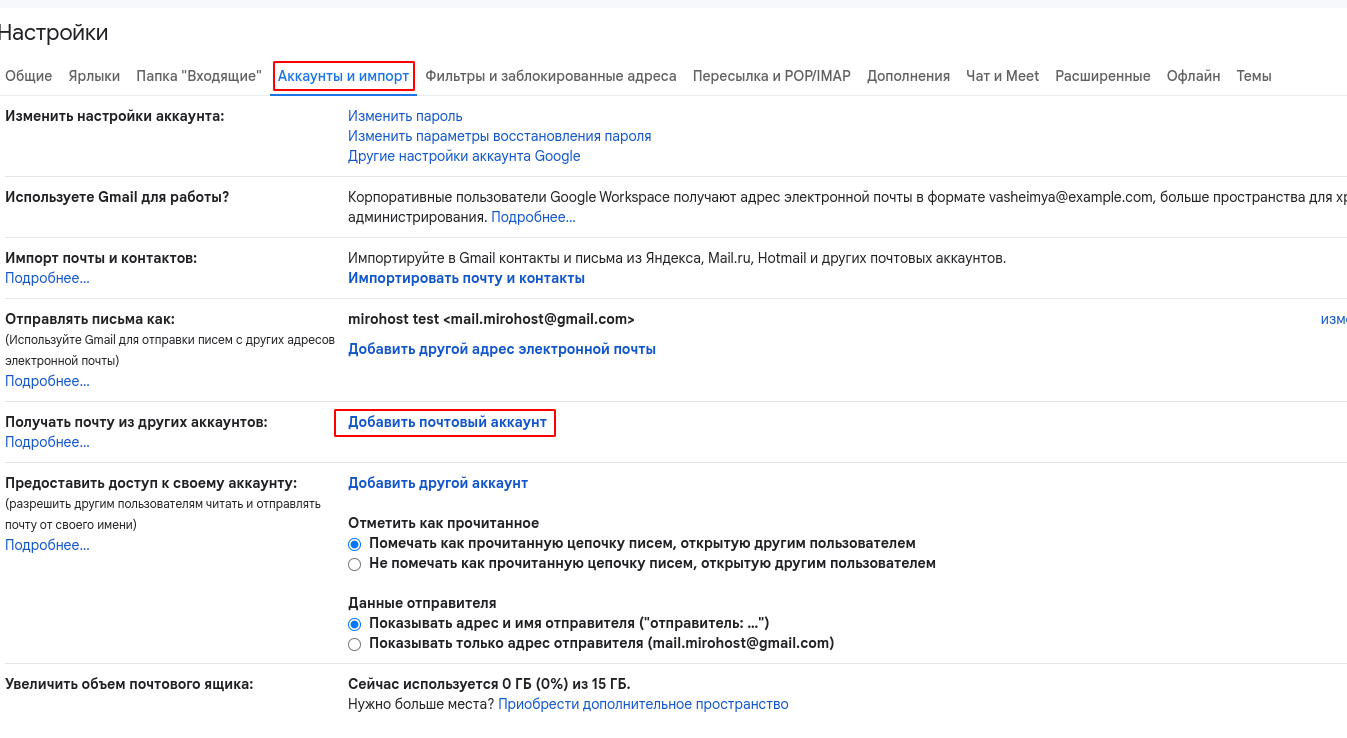
- Go to the "Accounts and Import" tab and in the "Receive mail from other accounts:" section, click "Add mail account".
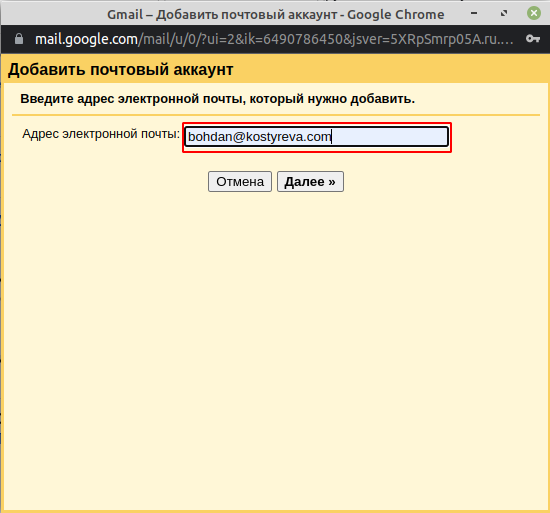
- Enter the full email address from which you want to collect mail and click the "Next" button. If you are using Mirohost hosting and you do not have a mailbox yet, you can create one using the instructions https://mirohost.net/ru/support/hosting-technical/kak-sozdat-pochtovyj-yashhik
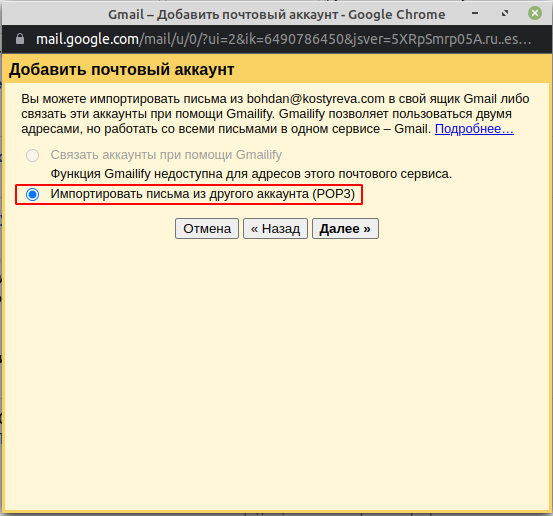
- Fill in the fields and click the "Add account" button.
- Username - enter the full address of your mailbox that you want to add to the collector. This can be the address of your mailbox in Mirohost.
- Password - the password to your mailbox.
- POP server - mx1.mirohost.net (if you are using the smart tariff plan, then enter the name of your server, for example ds258.mirohost.net)
- Port - 995
- Keep a copy of the received letter on the server - if you select this option, Gmail will collect messages from the mailbox, but they will also remain on the server so that they can be viewed from another device or in another mail client.
- Always use a secure connection (SSL) - enable for an encrypted connection when receiving letters. This will help ensure security when collecting mail.
- Assign a tag to incoming messages - enable if you want the letters to be marked with a separate tag. You can change this in the future if necessary.
- Archive incoming messages (bypassing the Inbox) optionally. Received messages will be immediately archived in your Gmail account. After entering the settings, select "Add account"
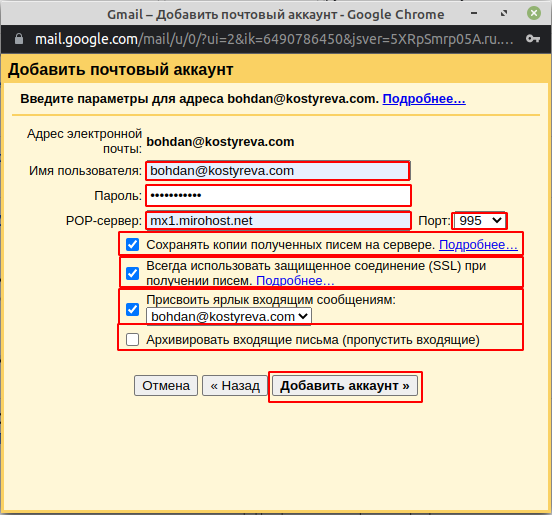
- To send emails from your mailbox using Gmail, select the appropriate option.
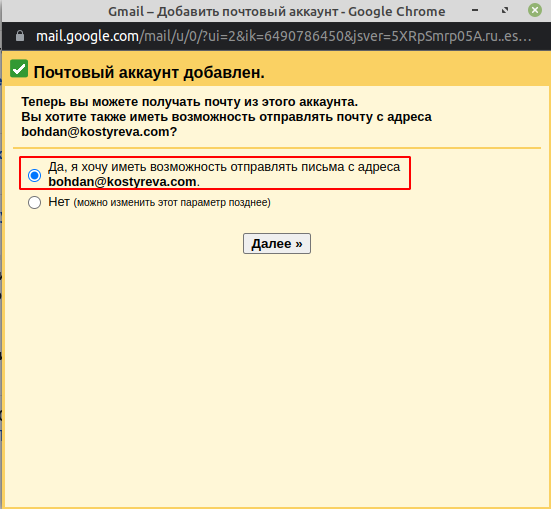
- Specify which name should appear in emails sent from Gmail.
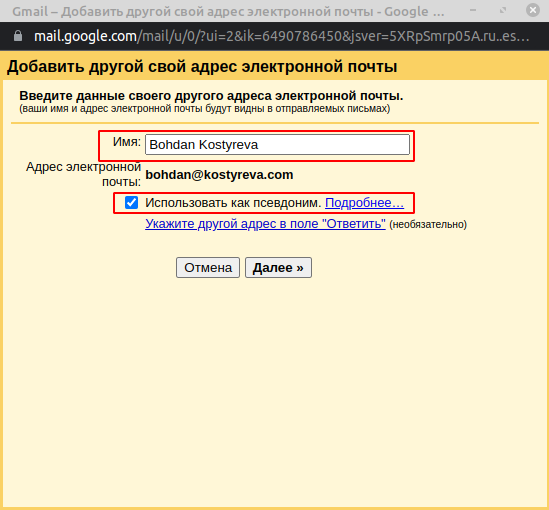
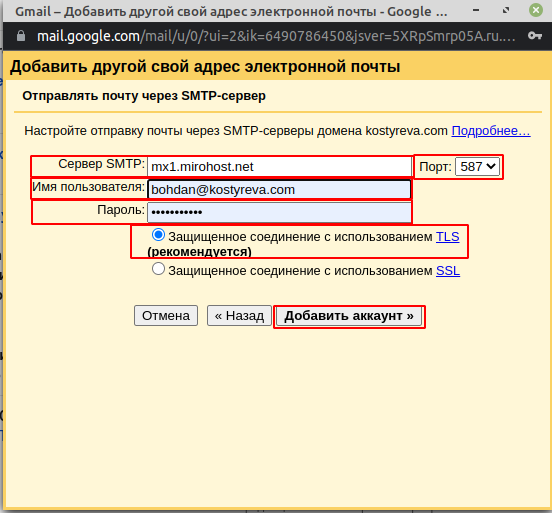
- Specify the outgoing mail server and click the "Add account" button.
- SMTP server - mx1.mirohost.net (if you are using the smart tariff plan, then enter the name of your server, for example ds258.mirohost.net)
- Username - enter the full address of your mailbox that you want to add to the collector. This can be the address of your mailbox in Mirohost.
- Password - the password to your mailbox.
- Port - 587
- Enable secure connection using TLS for an encrypted connection when sending emails.
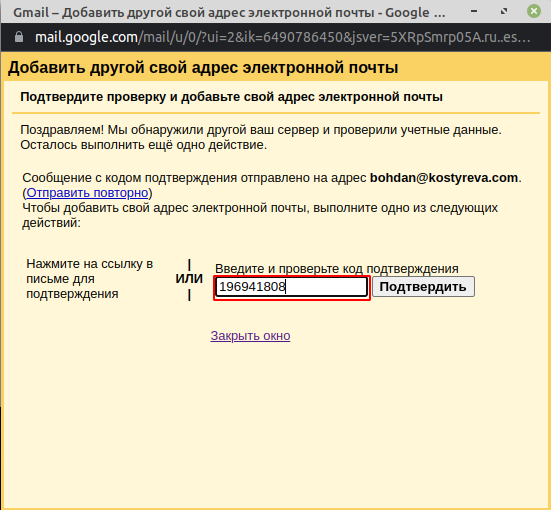
- You are almost done. Now you need to confirm your mailbox. If you are using Mirohost hosting, log in to your mailbox at mail.mirohost.net, find the confirmation email and click on the link, or enter the "Confirmation Code" sent in the email in the suggested input field and click "Confirm".
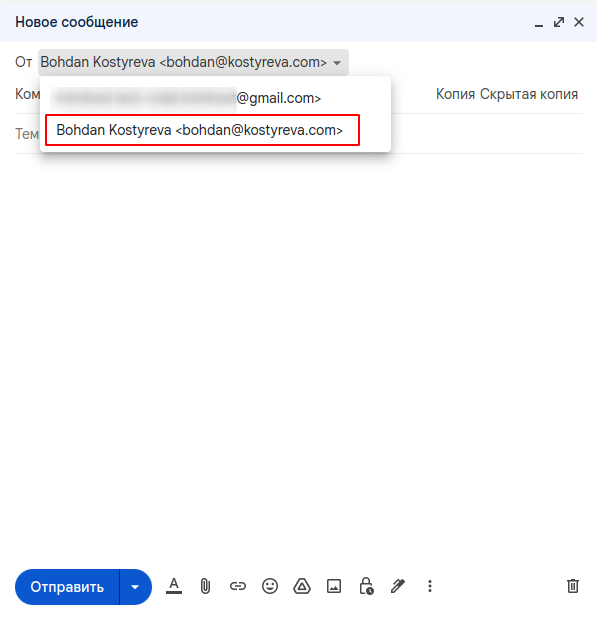
- Now test sending and receiving emails via Gmail. Note that you can send emails from the added mailbox using Gmail by clicking on the "From" field when composing an email.
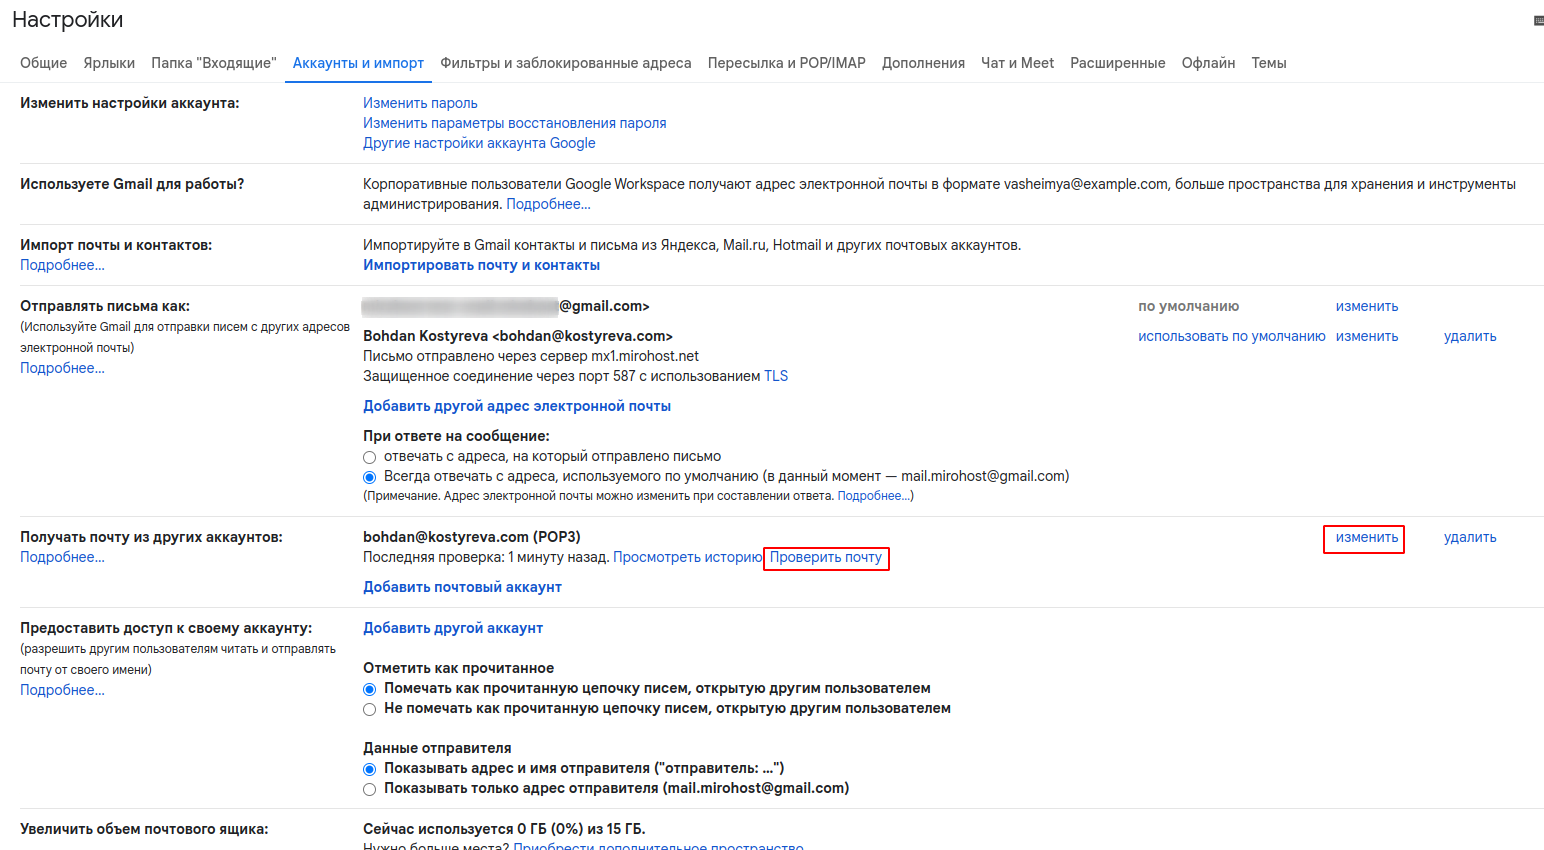
- If you have entered some data by mistake, do not worry. You can change it by clicking "Edit information". Also note that Gmail checks for new messages in your mailbox offline. That is, the message sent to you may appear in Gmail only after some time (about 15 minutes). If you want to check for new messages right now, click the "Check mail now" button.
