SSH access
SSH access (without root) is granted with eVPS and SmartDedicated tariff plans.
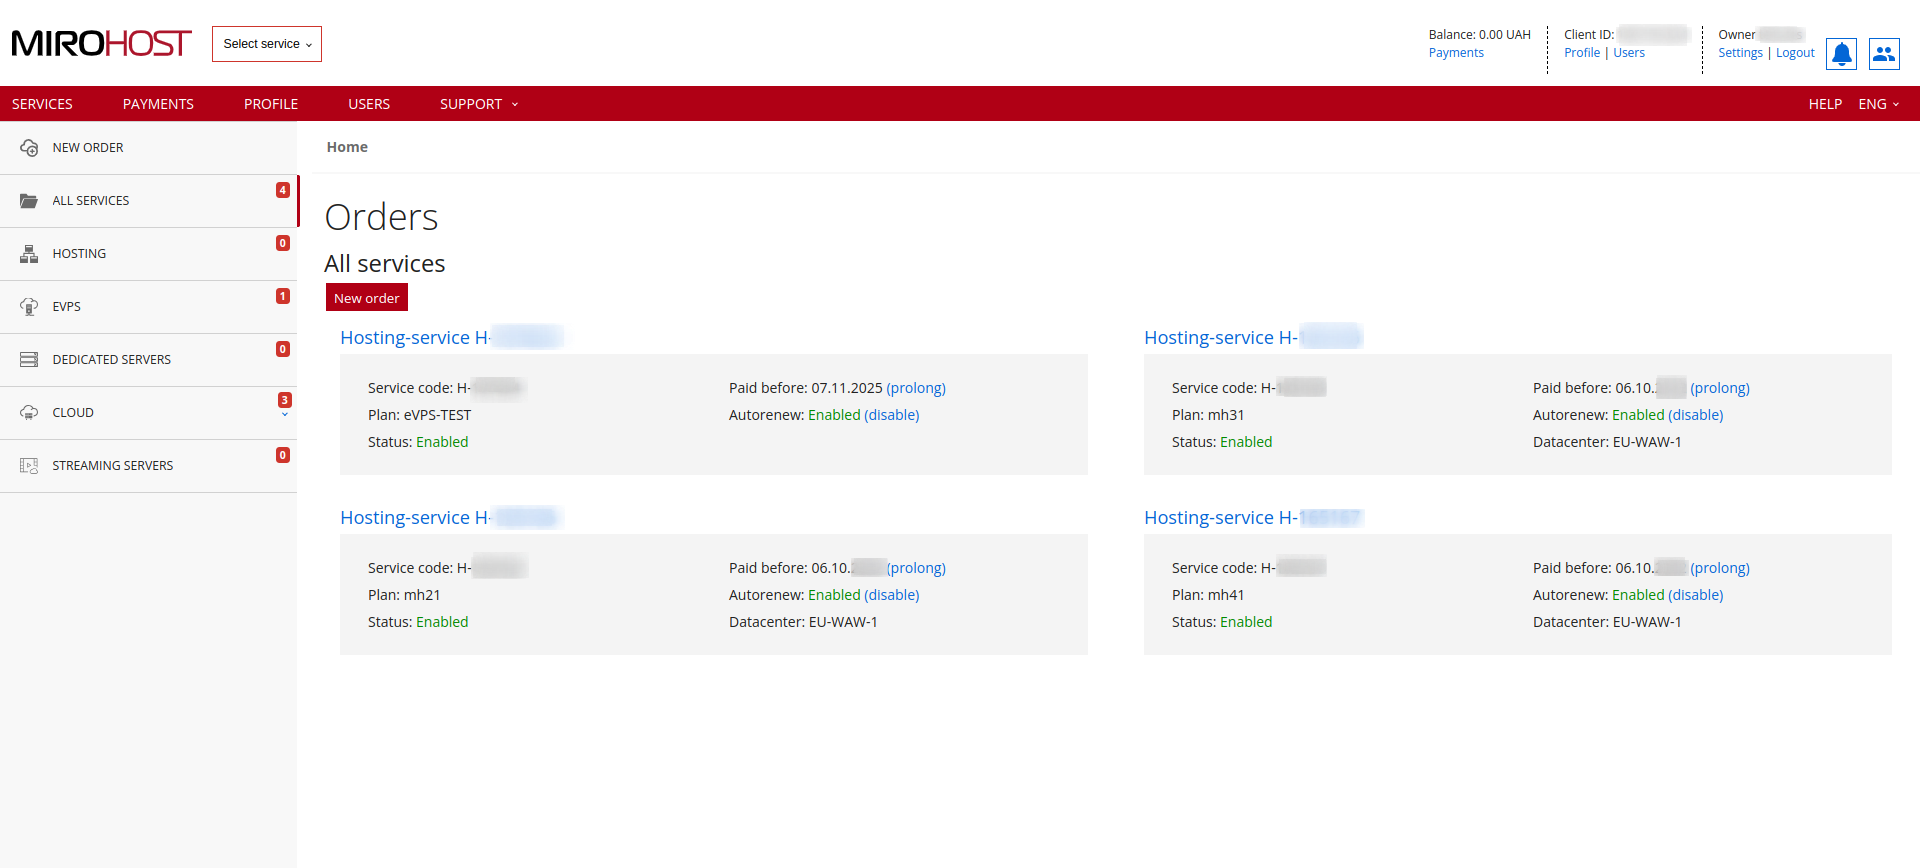
Step 1. Login to the Mirohost control panel
Step 2. Select the required hosting package and then the domain for which you need to configure
 If you have registered one hosting package, click on "Hosting-service H-******" and select the domain for which you need to configure

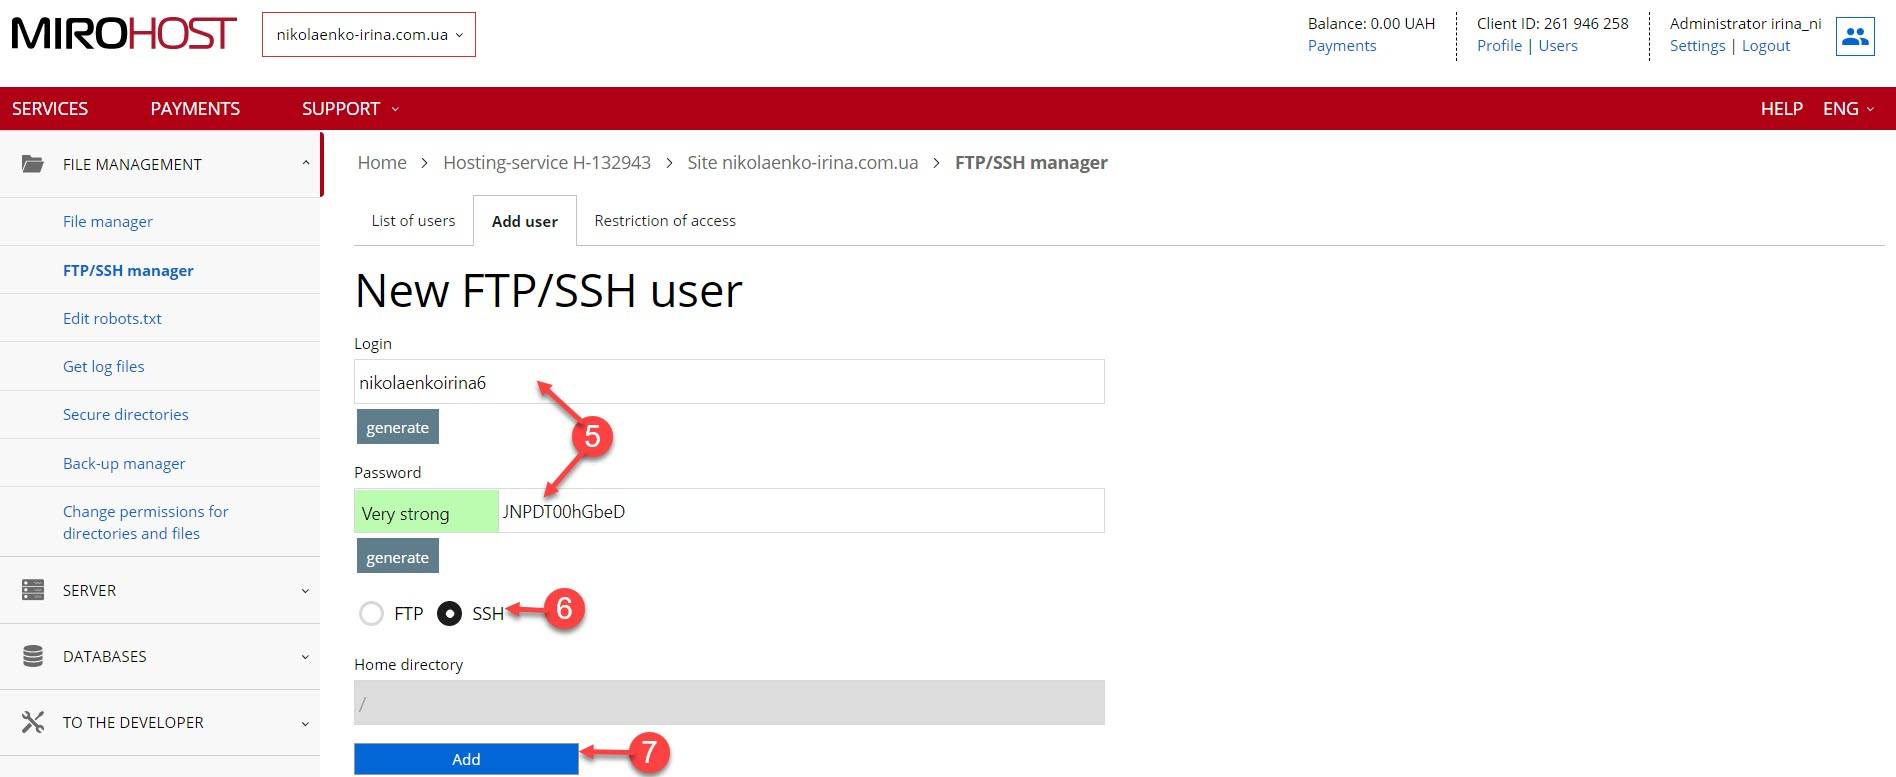
Step 3. Select ‘FTP/SSH management’ (Website management → FTP/SSH management).

Step 4. Go to ‘Add user’ section.
Step 5. Generate a name and a password.
Step 6. Select the ‘SSH’ user type.
Step 7. Press ‘Add’ and finish the creation.

Also, in response to increasing rates of mass password forcing to SSH accounts, we have imposed limits on SSH access. To get an SSH access you need to mark your IP address or addresses as allowed.
The addresses can be added by hosting control panel, ‘Website management’ section → ‘FTP management’ → ‘Restrict access’. Permits to access from any host don’t work for SSH.
