FTP users creation and management
Step 1. Login to the Mirohost control panel
Step 2. Select the required hosting package and then the domain for which you need to configure
 If you have registered one hosting package, click on "Hosting-service H-******" and select the domain for which you need to configure
Step 3. Go to "FTP/SSH Management" (File Management → FTP/SSH Management in the sidebar menu).
In this section, the following data is available:
-
Server name for connection: ****.mirohost.net
-
Full path to the home directory: /var/www/HOME_DIR
-
FTP or SSH login
-
Password
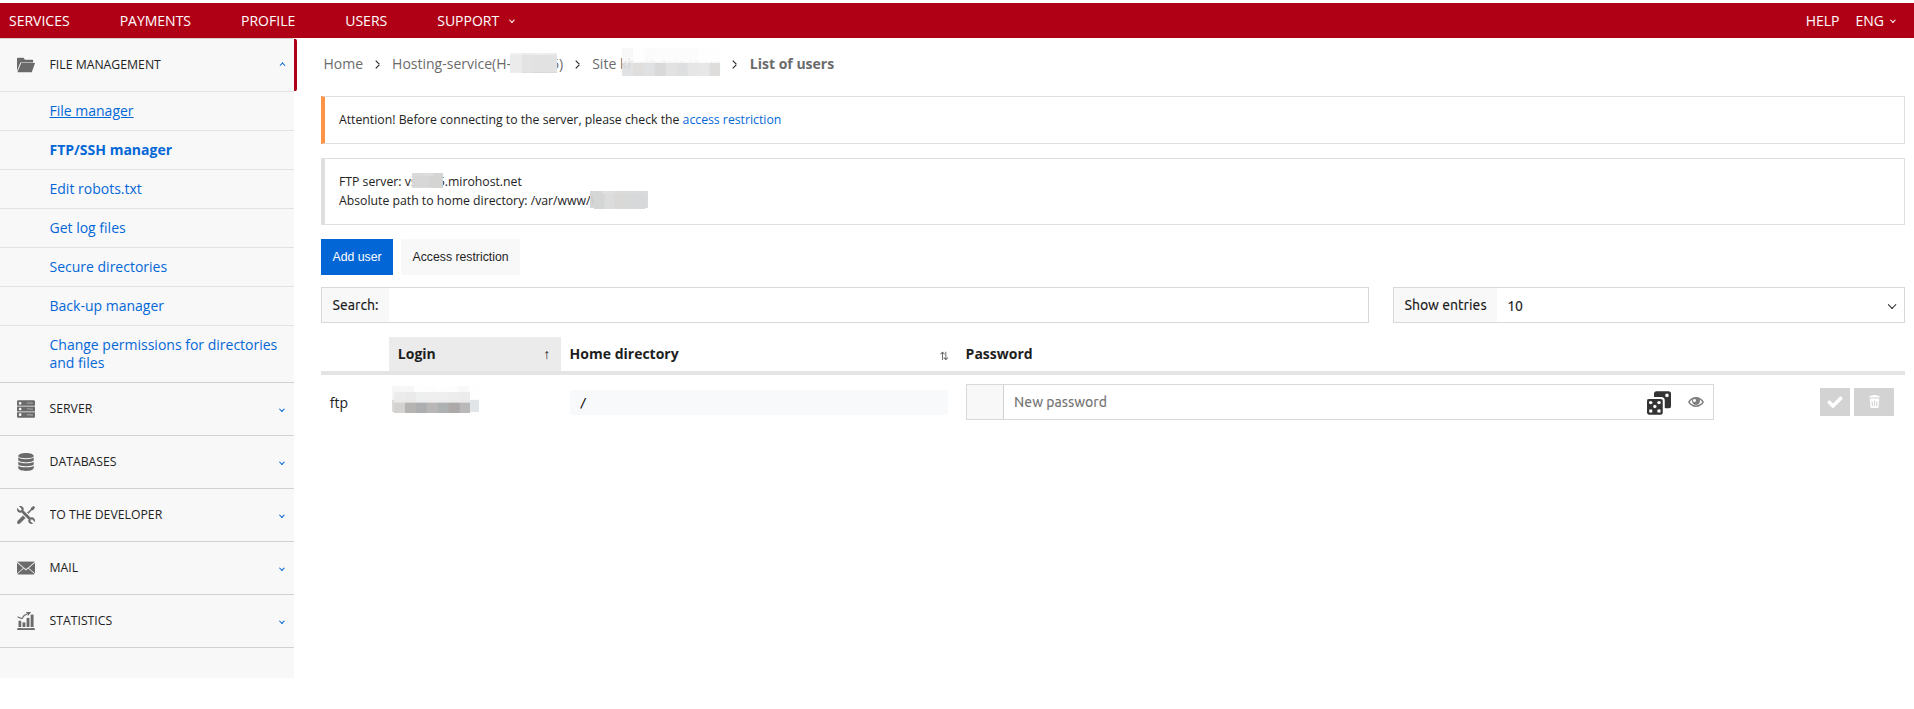
When adding a new website to the hosting, a default FTP user is created. This is the primary account and cannot be deleted from the server.
Step 4. To create an additional account, click "Add User".

Only one SSH user is allowed.
SSH access is not available for "Mini", "Site", and "Portal" plans.
Step 5. FTP account successfully created.
Additionally, in the "FTP/SSH Management" section, you can delete users or change their passwords.
Step 6. Configuring server access restrictions.
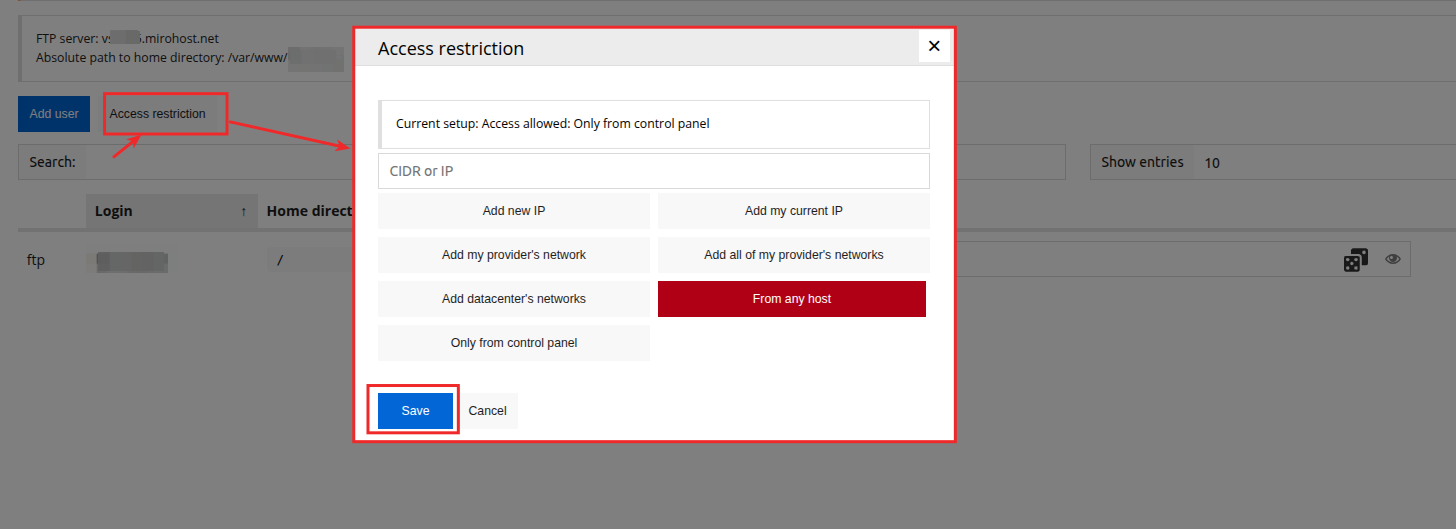
Warning! By default, FTP/SSH access to the website's home directory is restricted to the control panel's file manager only. These security settings mean you will not be able to connect to the server from your computer using FTP clients.
Step 7. Save the changes and test your FTP or SSH connection.